Your cart is currently empty!
Designing Your Own:
Because the flick of the sonic is integral to design of the sonic screwdriver, the dimension sheets we’ve provided also detail how to make a CT style flick mechanism. First thing to note before starting is this design requires threads or your flick mechanism will fail over time. Secondly, the dimensions do not have any leeway. If a hole is 10mm then the shaft that fits there is also 10mm. It is up to you to determine the leeway you want based on the machine you are using.
We have split this sonic up into three parts. The first section is from the copper pommel to the top of the leather handle which we will call the handle. The second part is from the copper collar above the leather handle to the copper ring above the second core. We will call this second part the core cage. The last part consists of all the aluminum sections, a brass sliding mechanism, and the lens and final core. This part will be referred to as the aluminum cage.
Flicking:
The flicking mechanism works via two things: The internal slider which stops the extension and the clearance between the aluminum body/core cage which determines the friction when flicking.
What You’re Building:

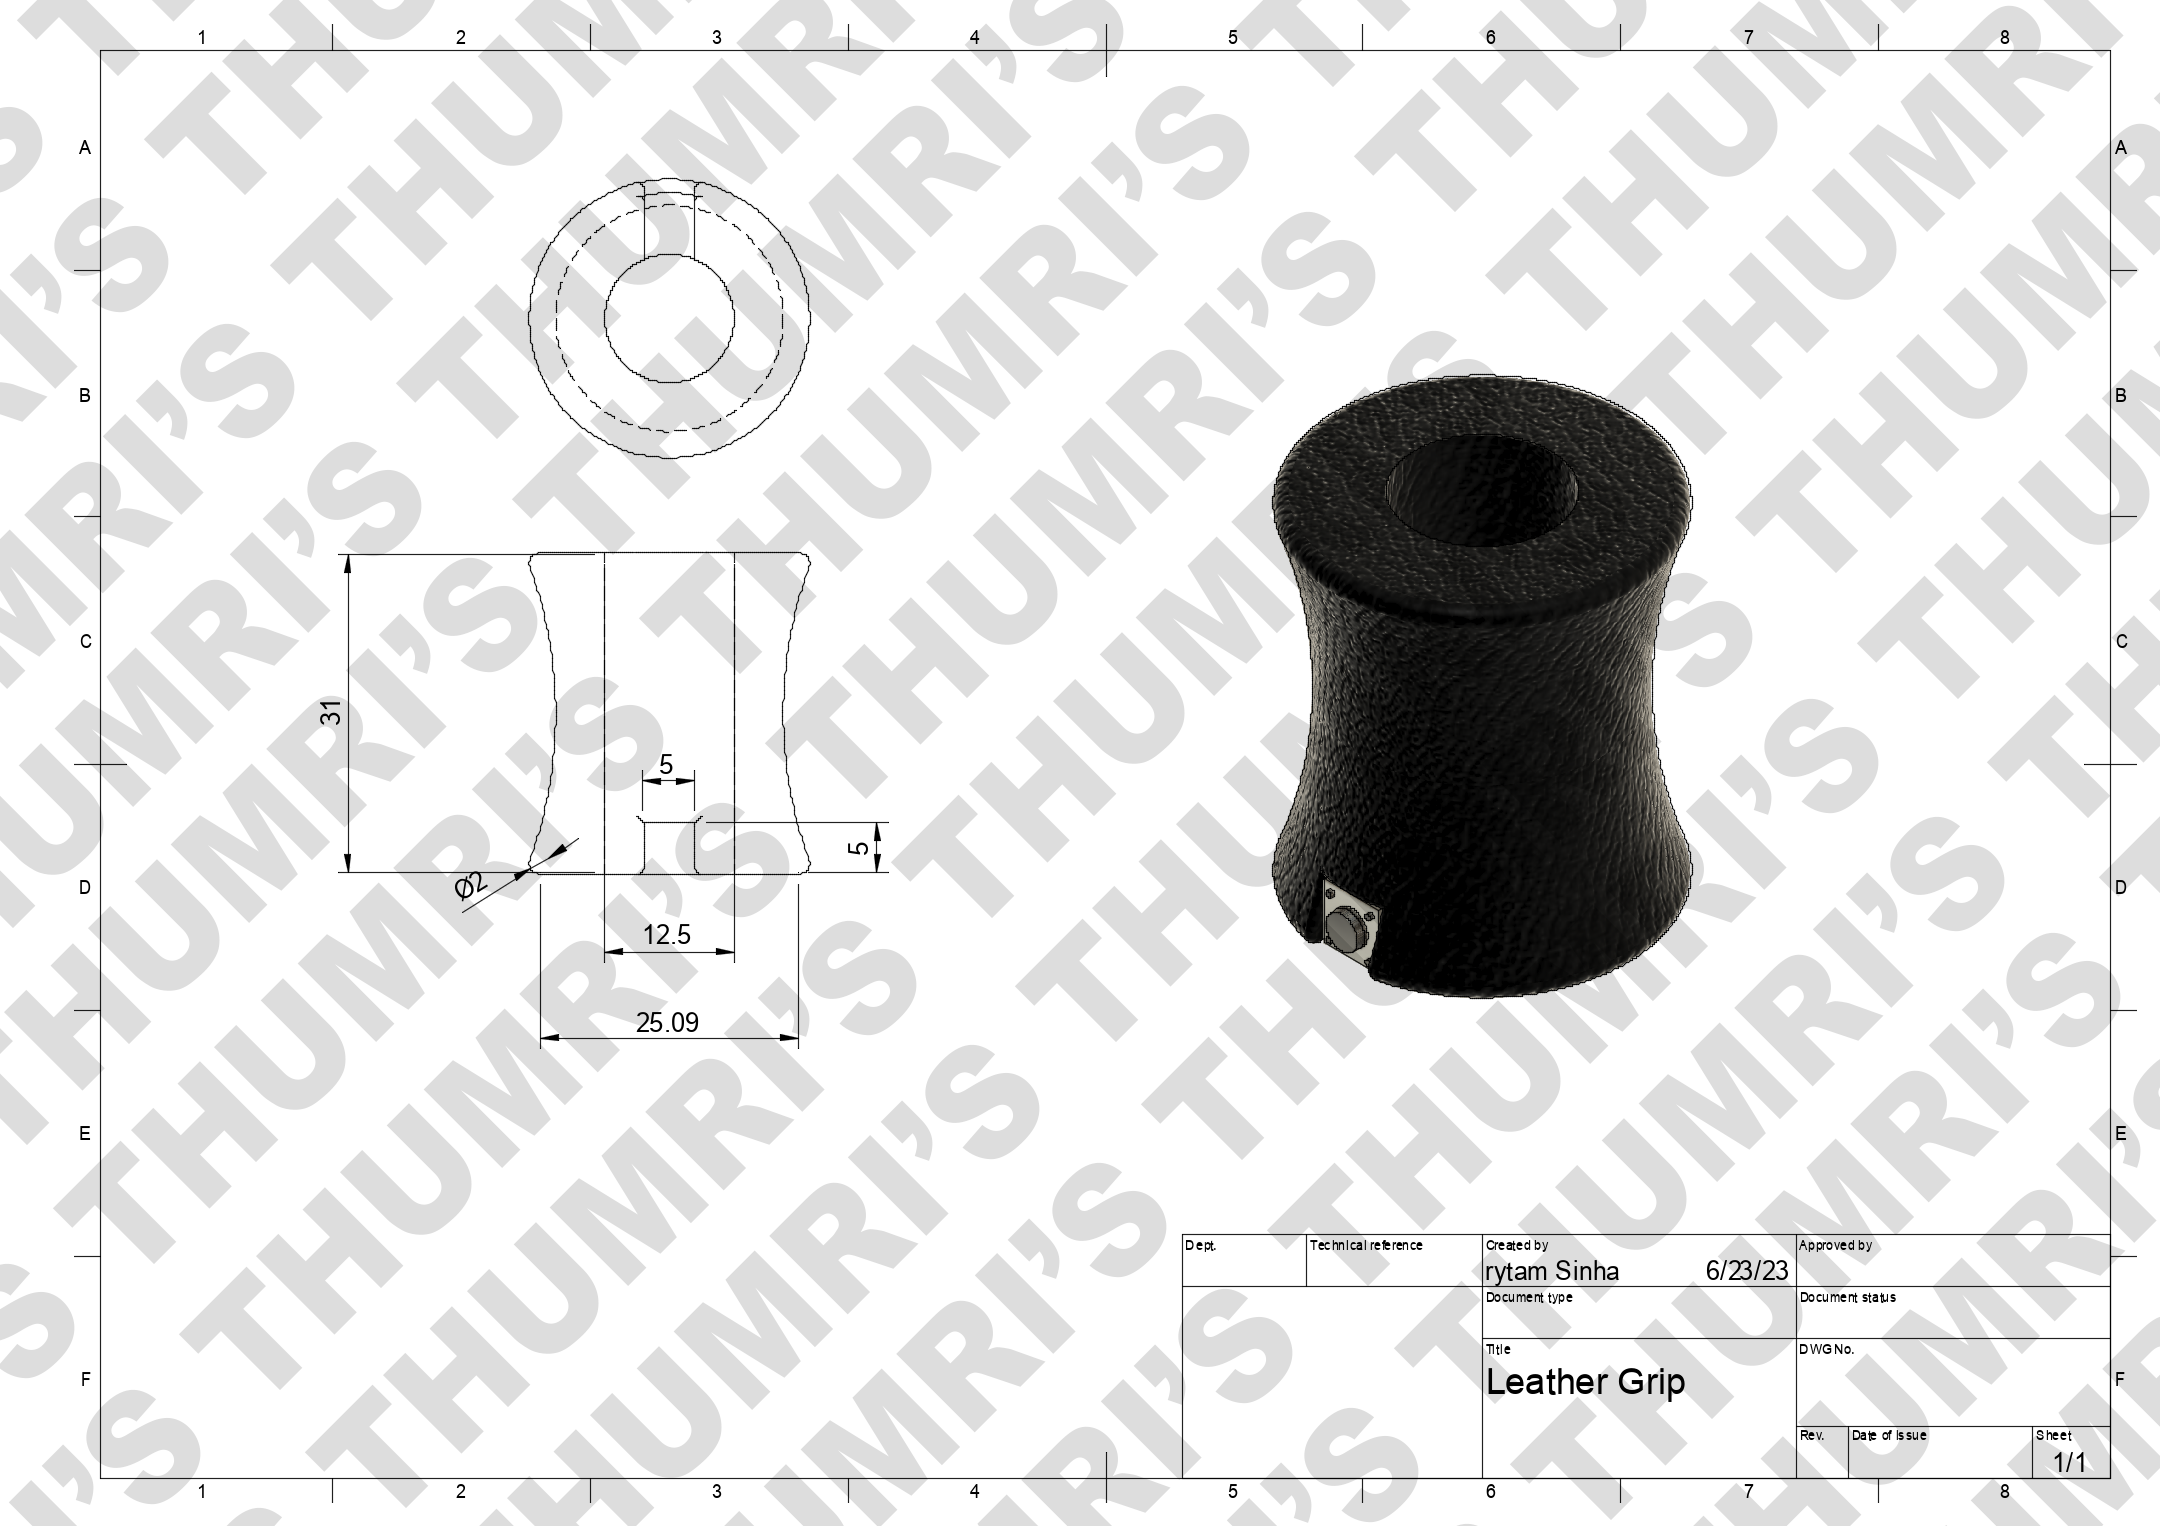
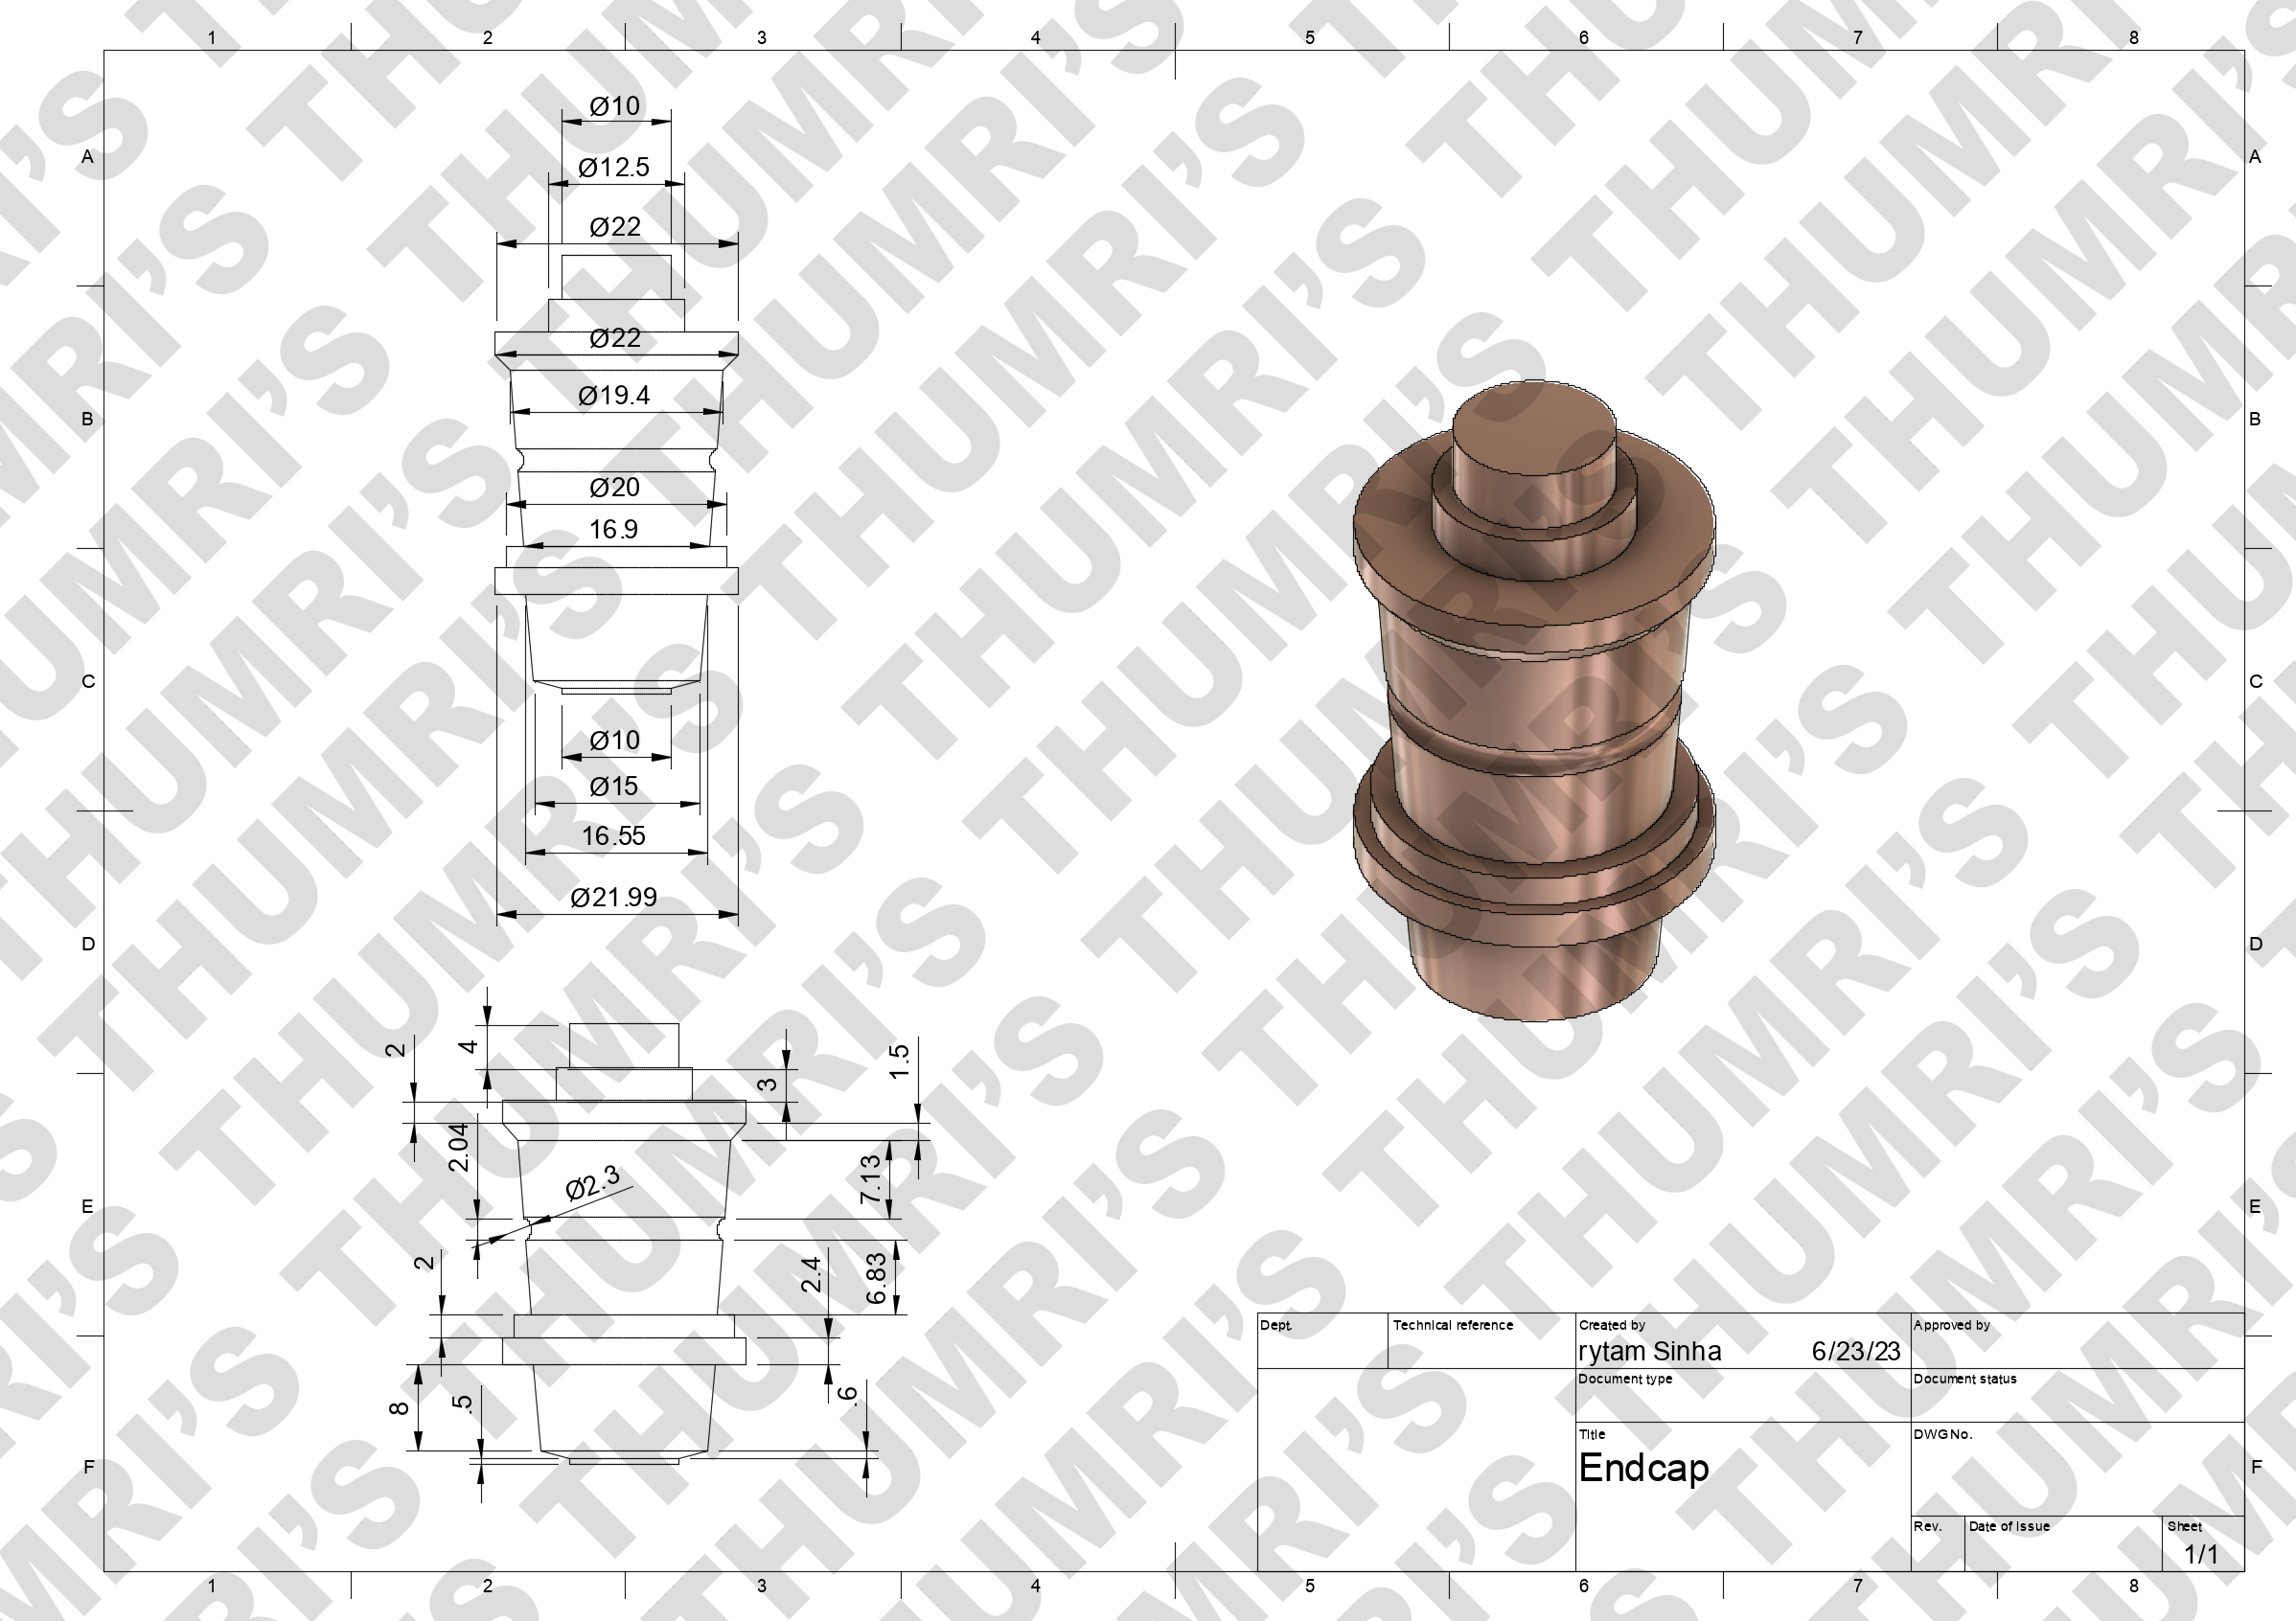
The Handle:
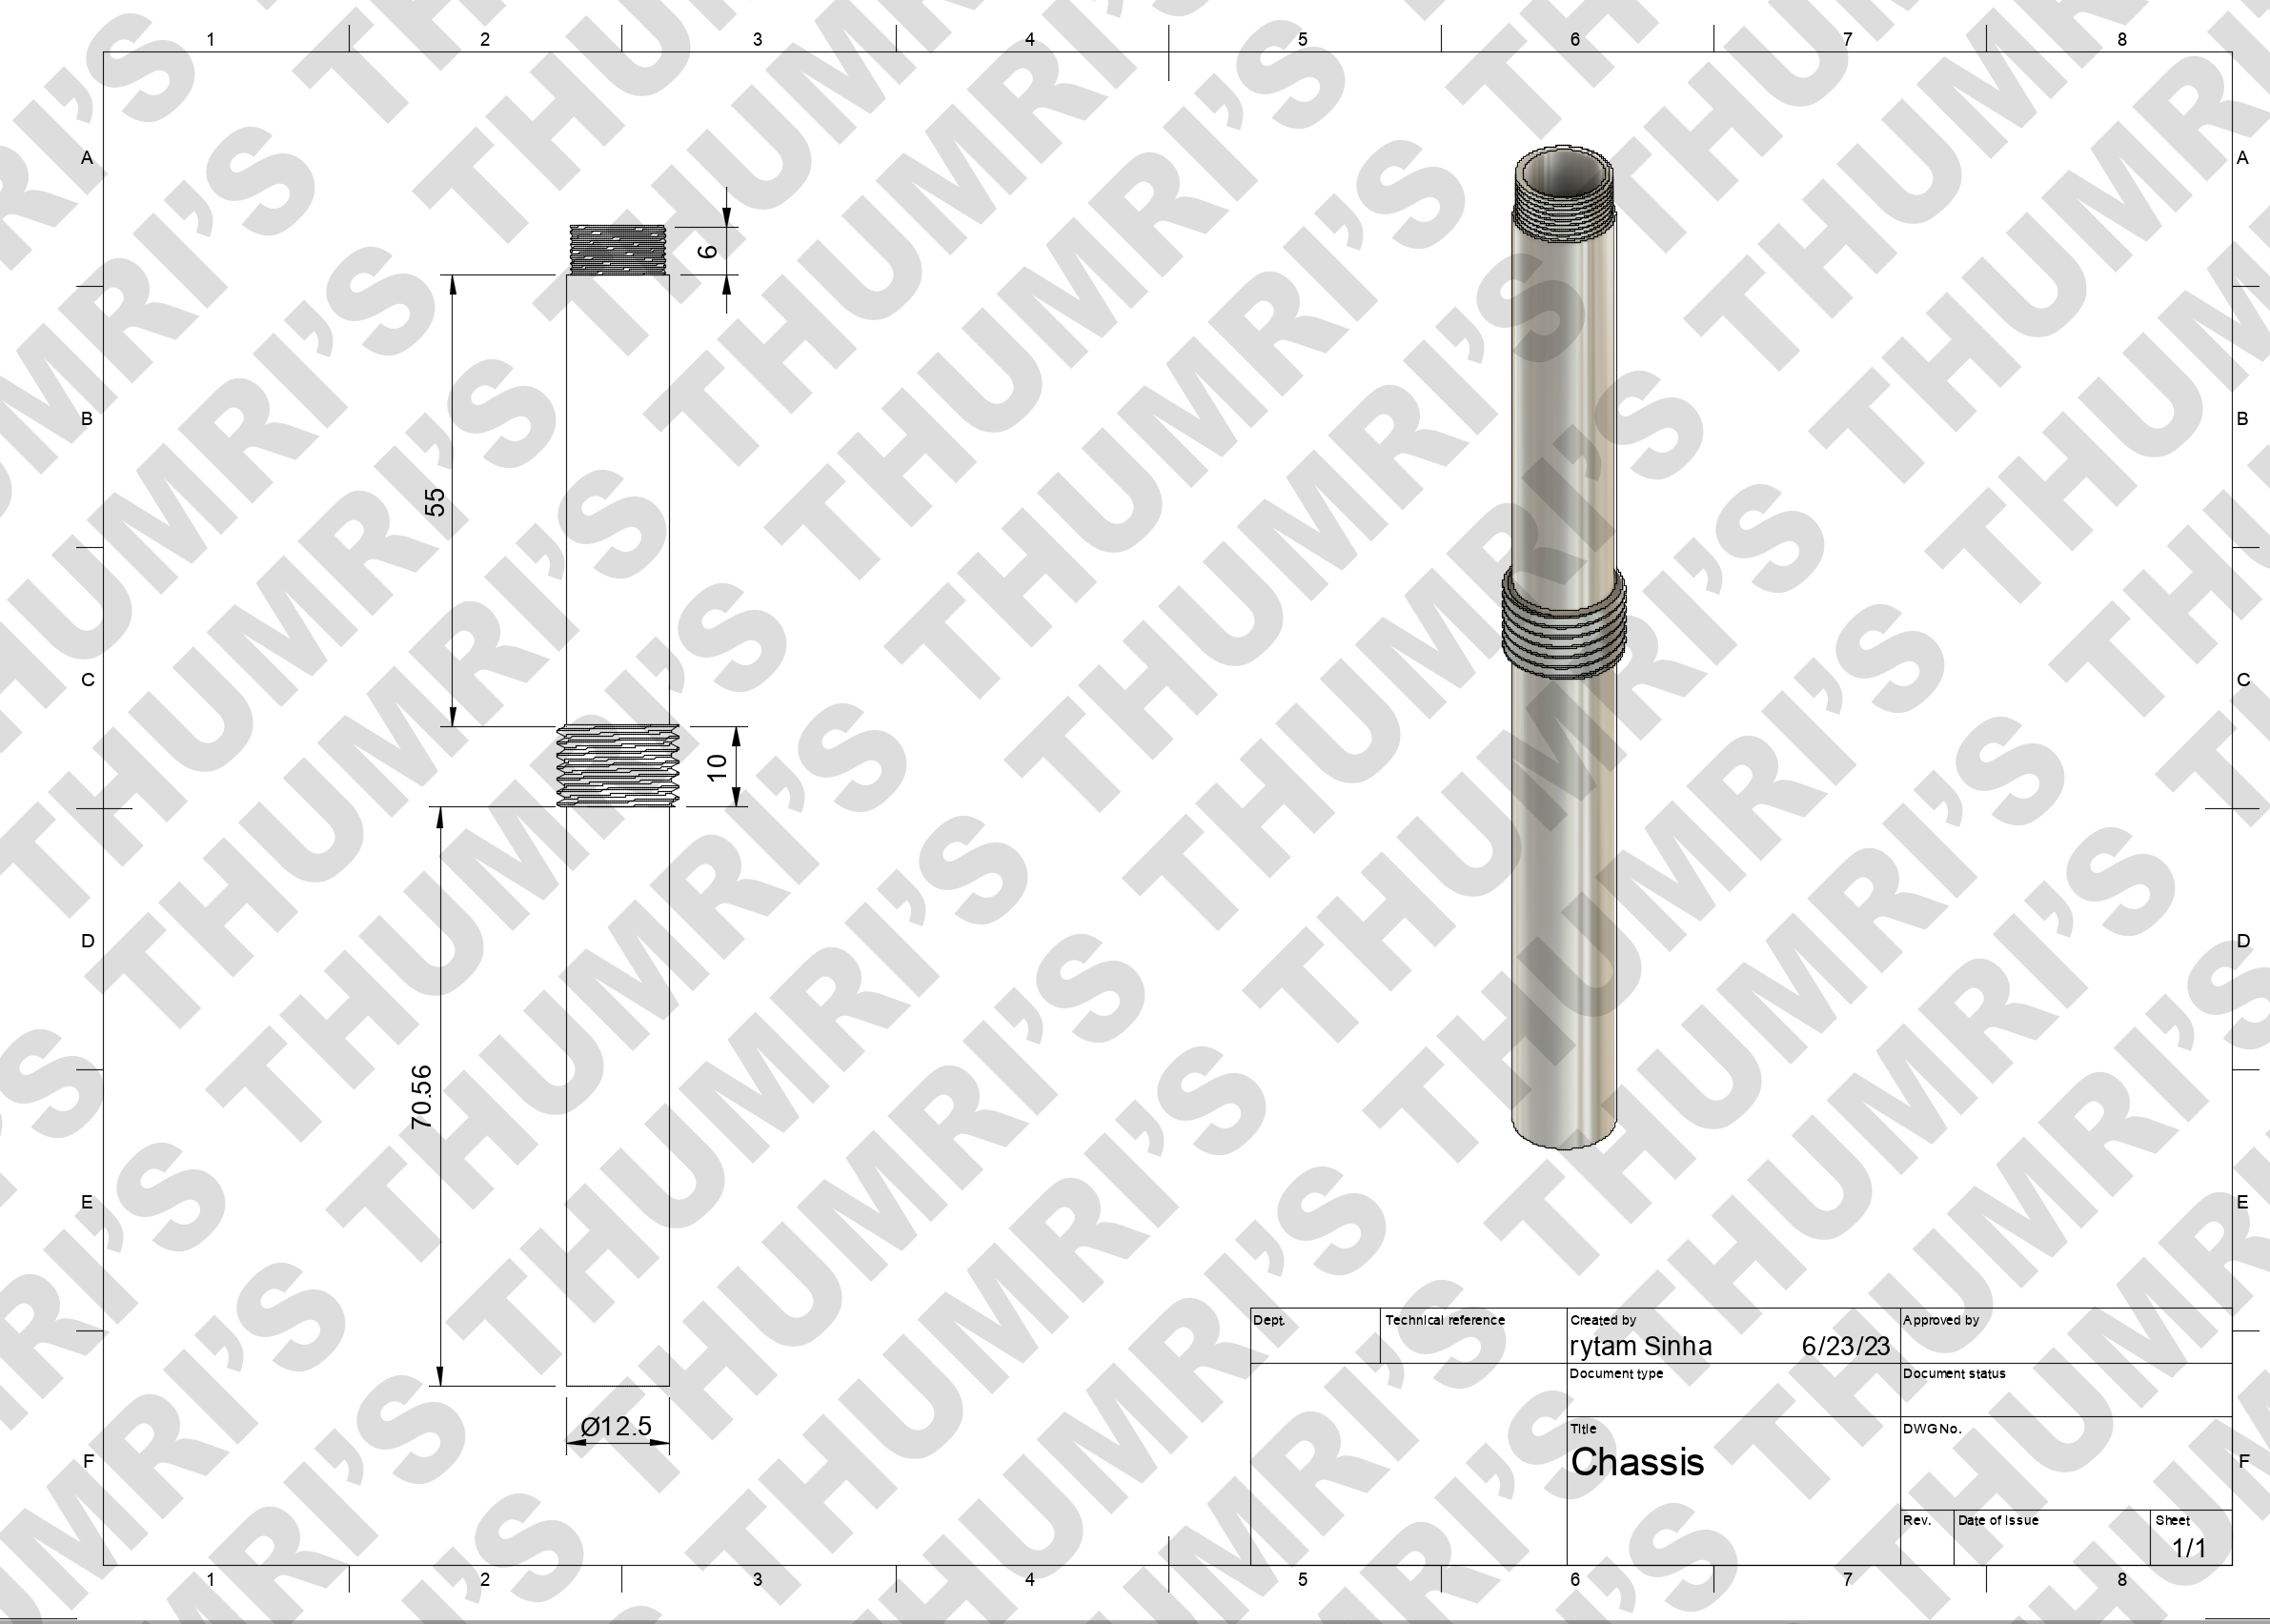
The handle consists of the copper pommel, the white resin cast, the copper ring, and the leather grip. All the parts are held together with an aluminum tube (which we will call the chassis). If you want to add electronics to your design we suggest you do it inside the leather grip. Leave space below the grip for your battery. Avoid electronics above the grip or the screwdriver will become too top heavy. Simply slide the leather grip followed by the ring followed by the resin cast, followed by the endcap. We strongly suggest adding threads between the mating faces of the endcap and the chassis to strengthen their connection. These threads are not present in the model sheets as they are not strictly necessary with good tolerances.
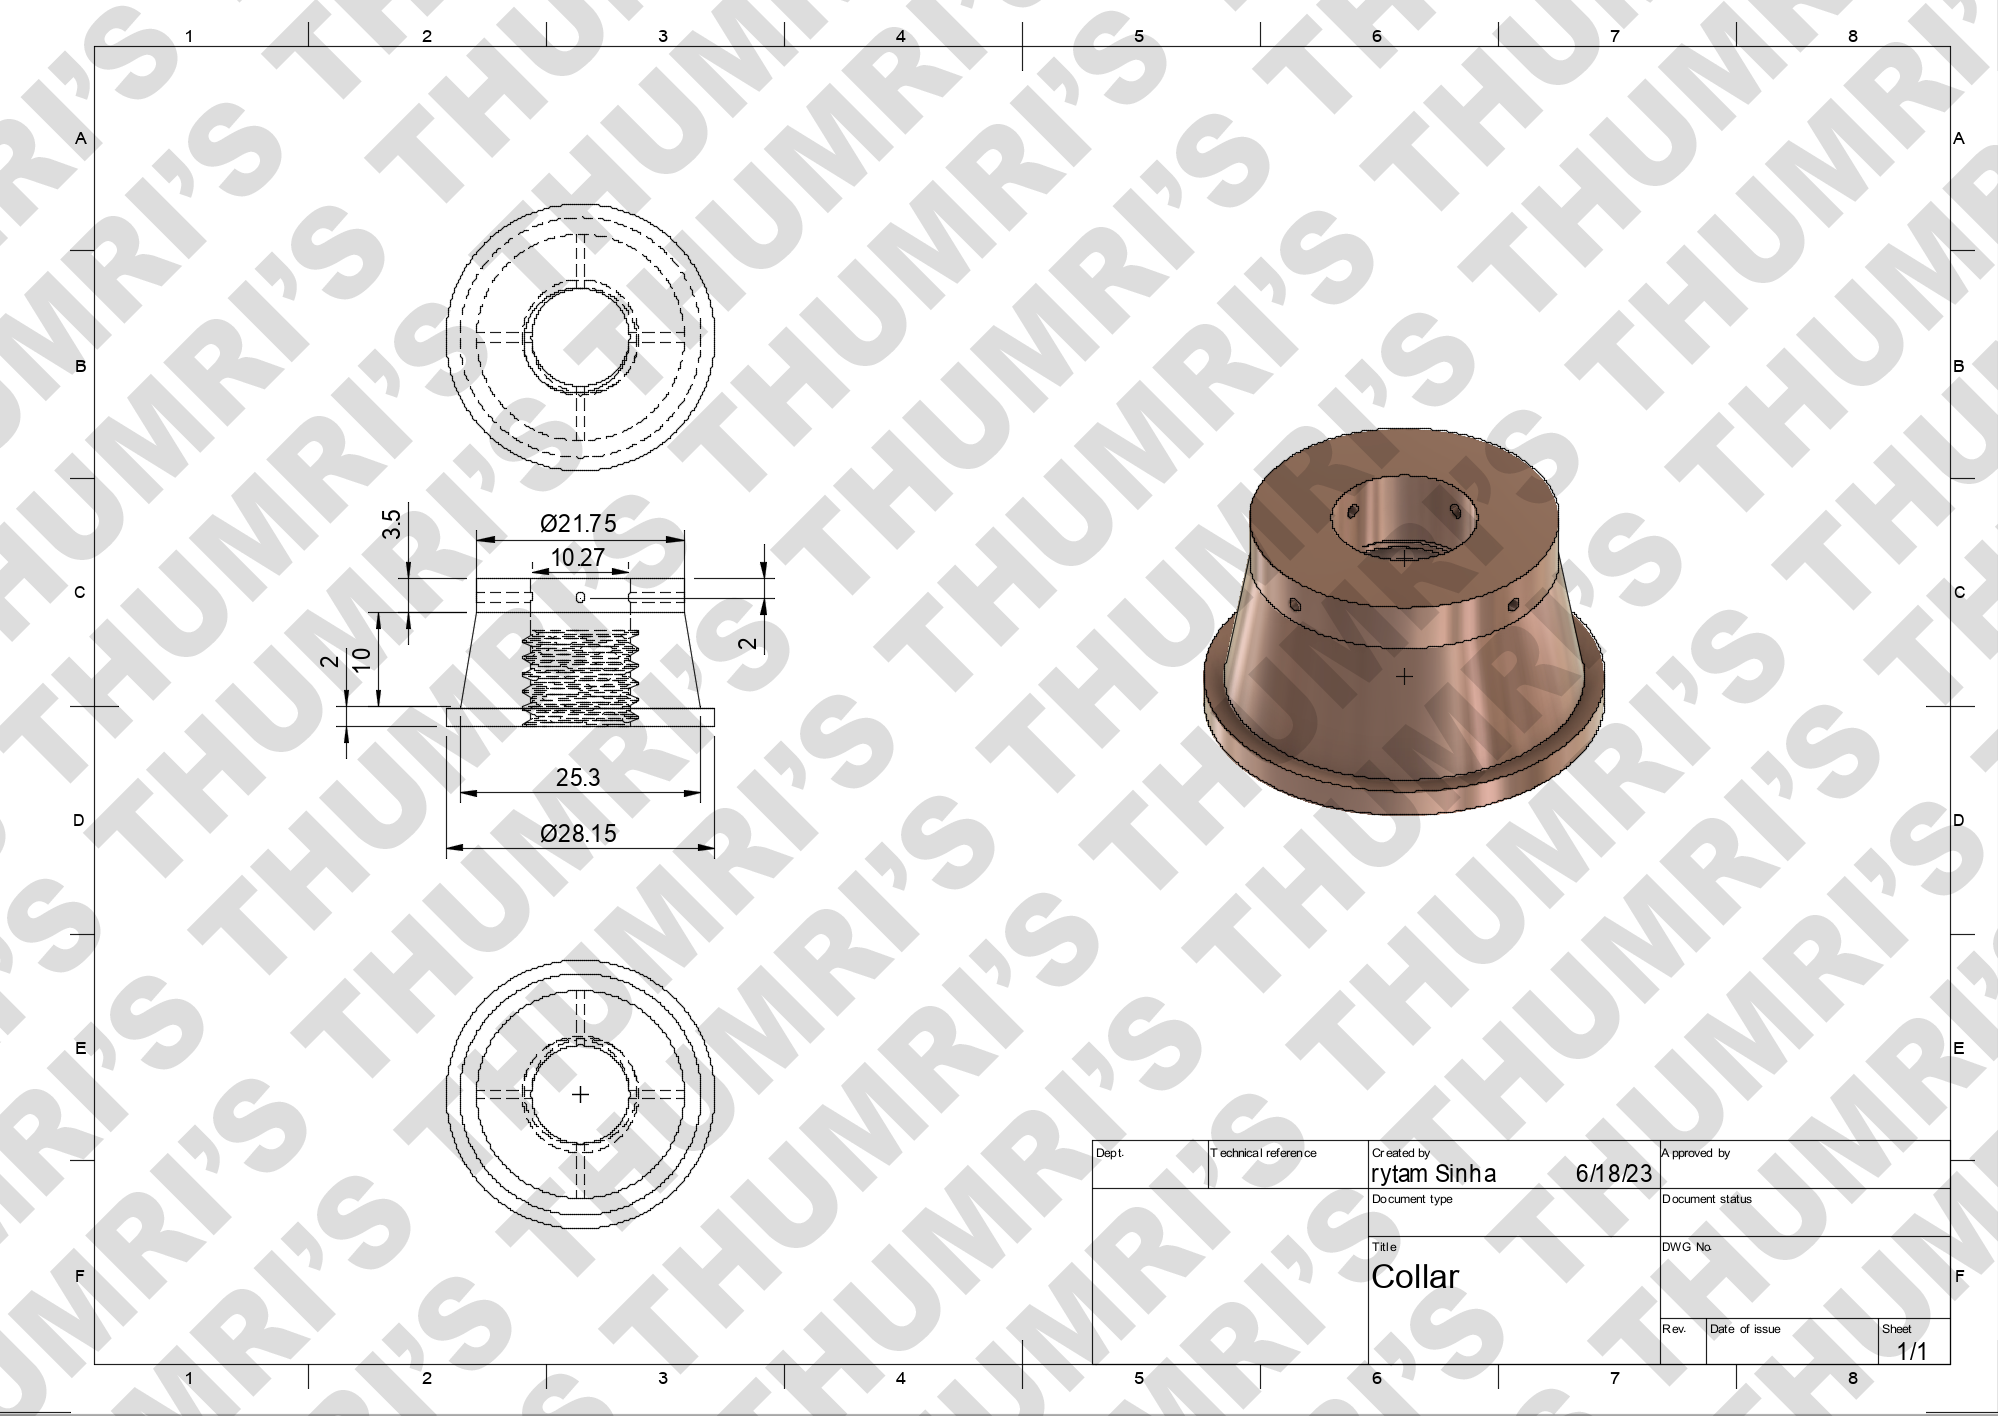
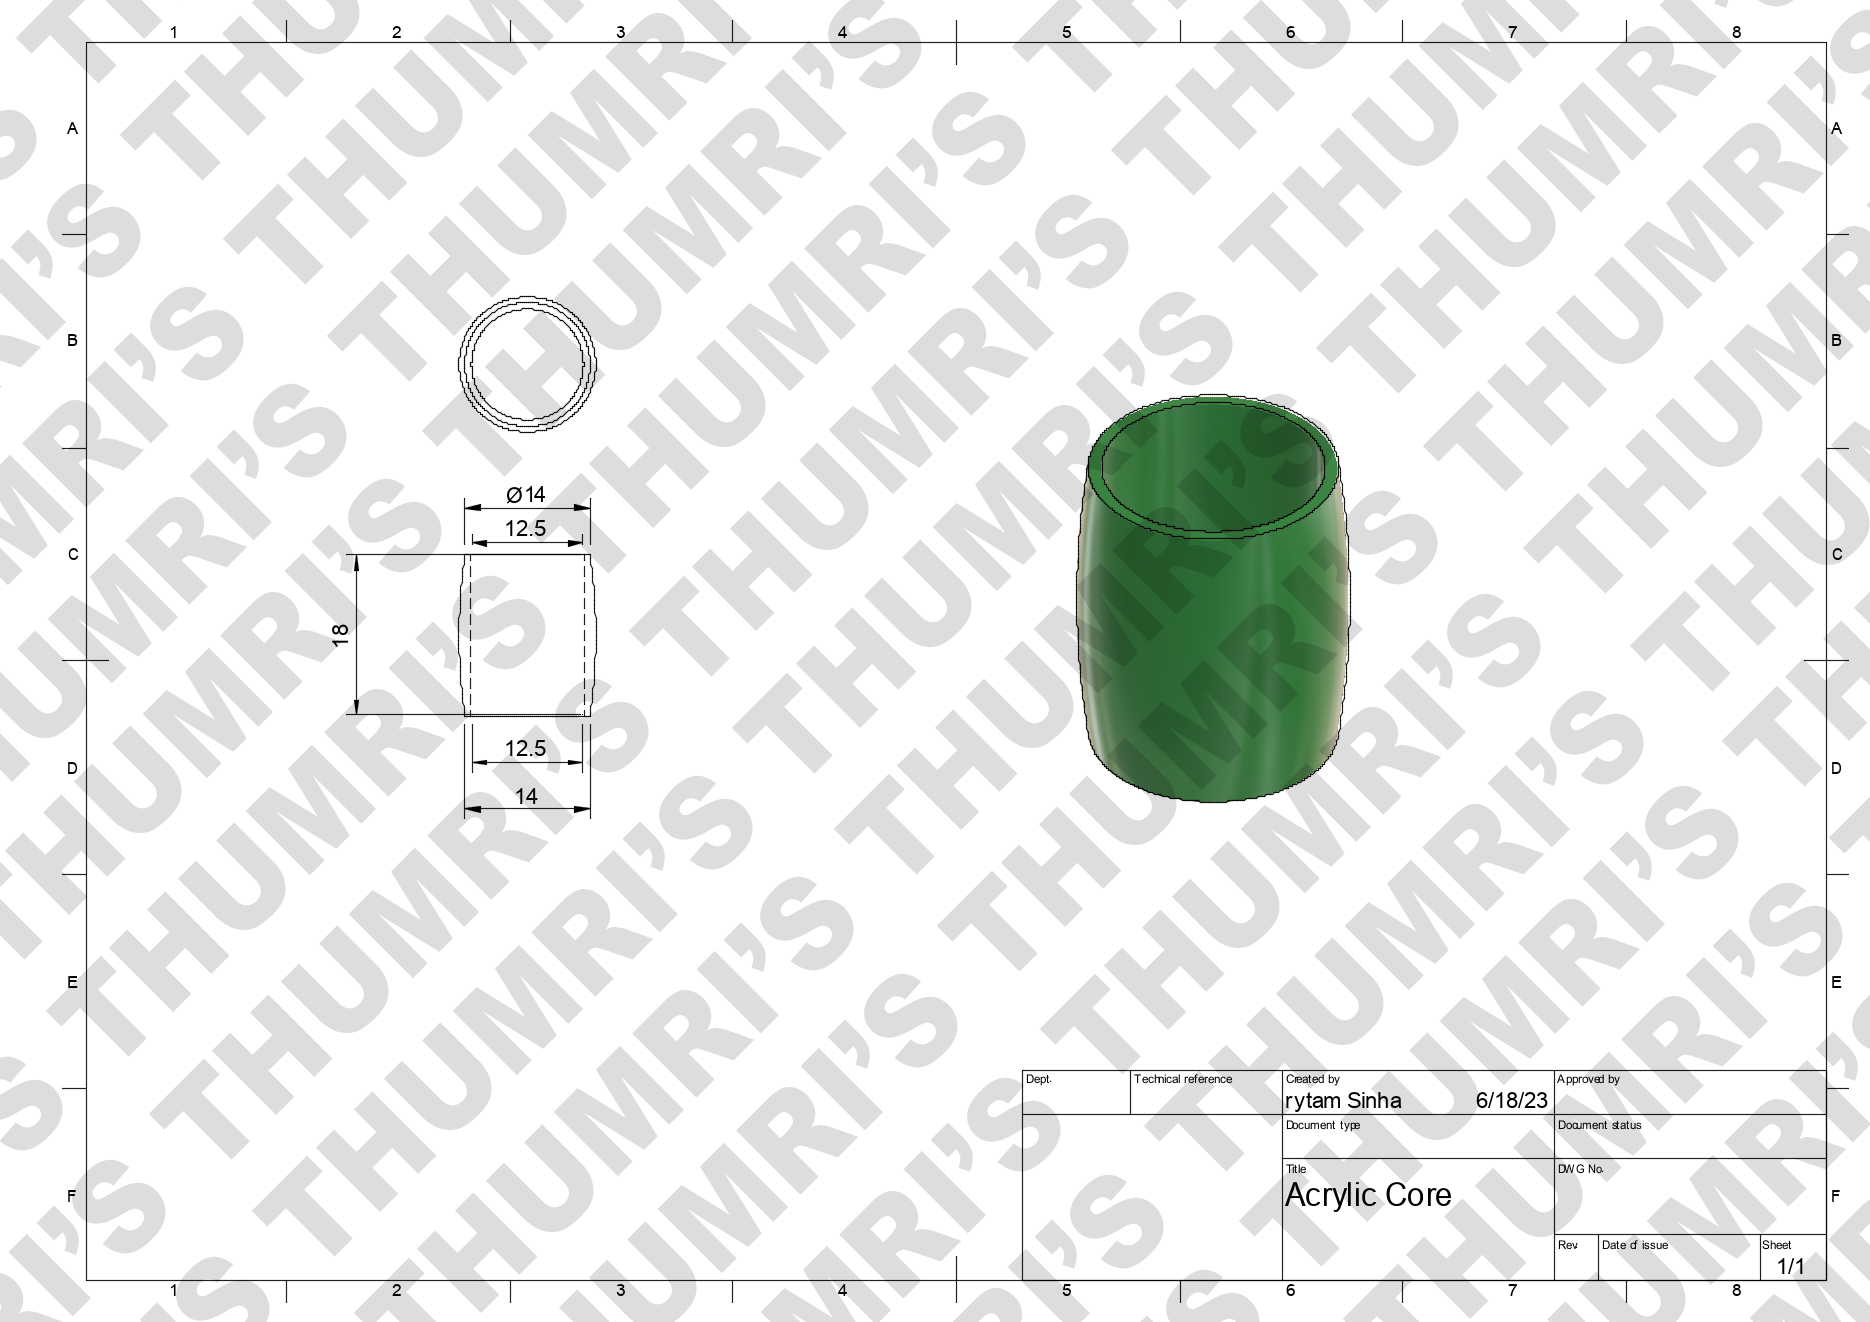
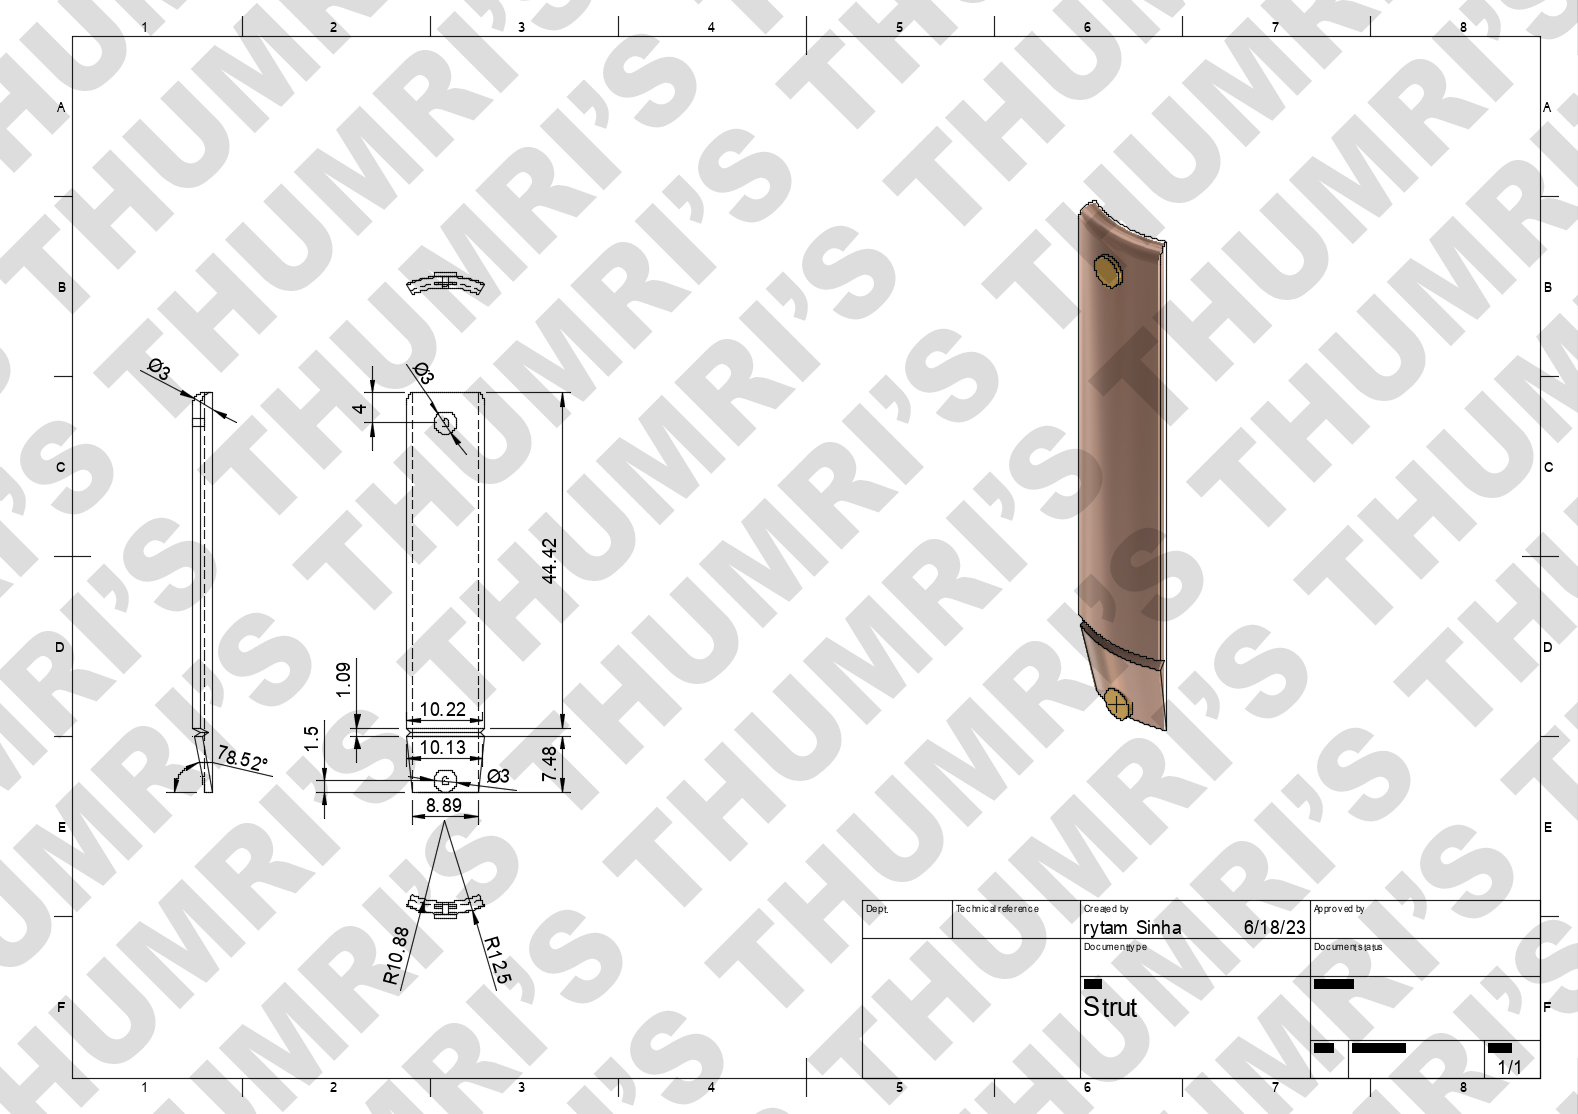
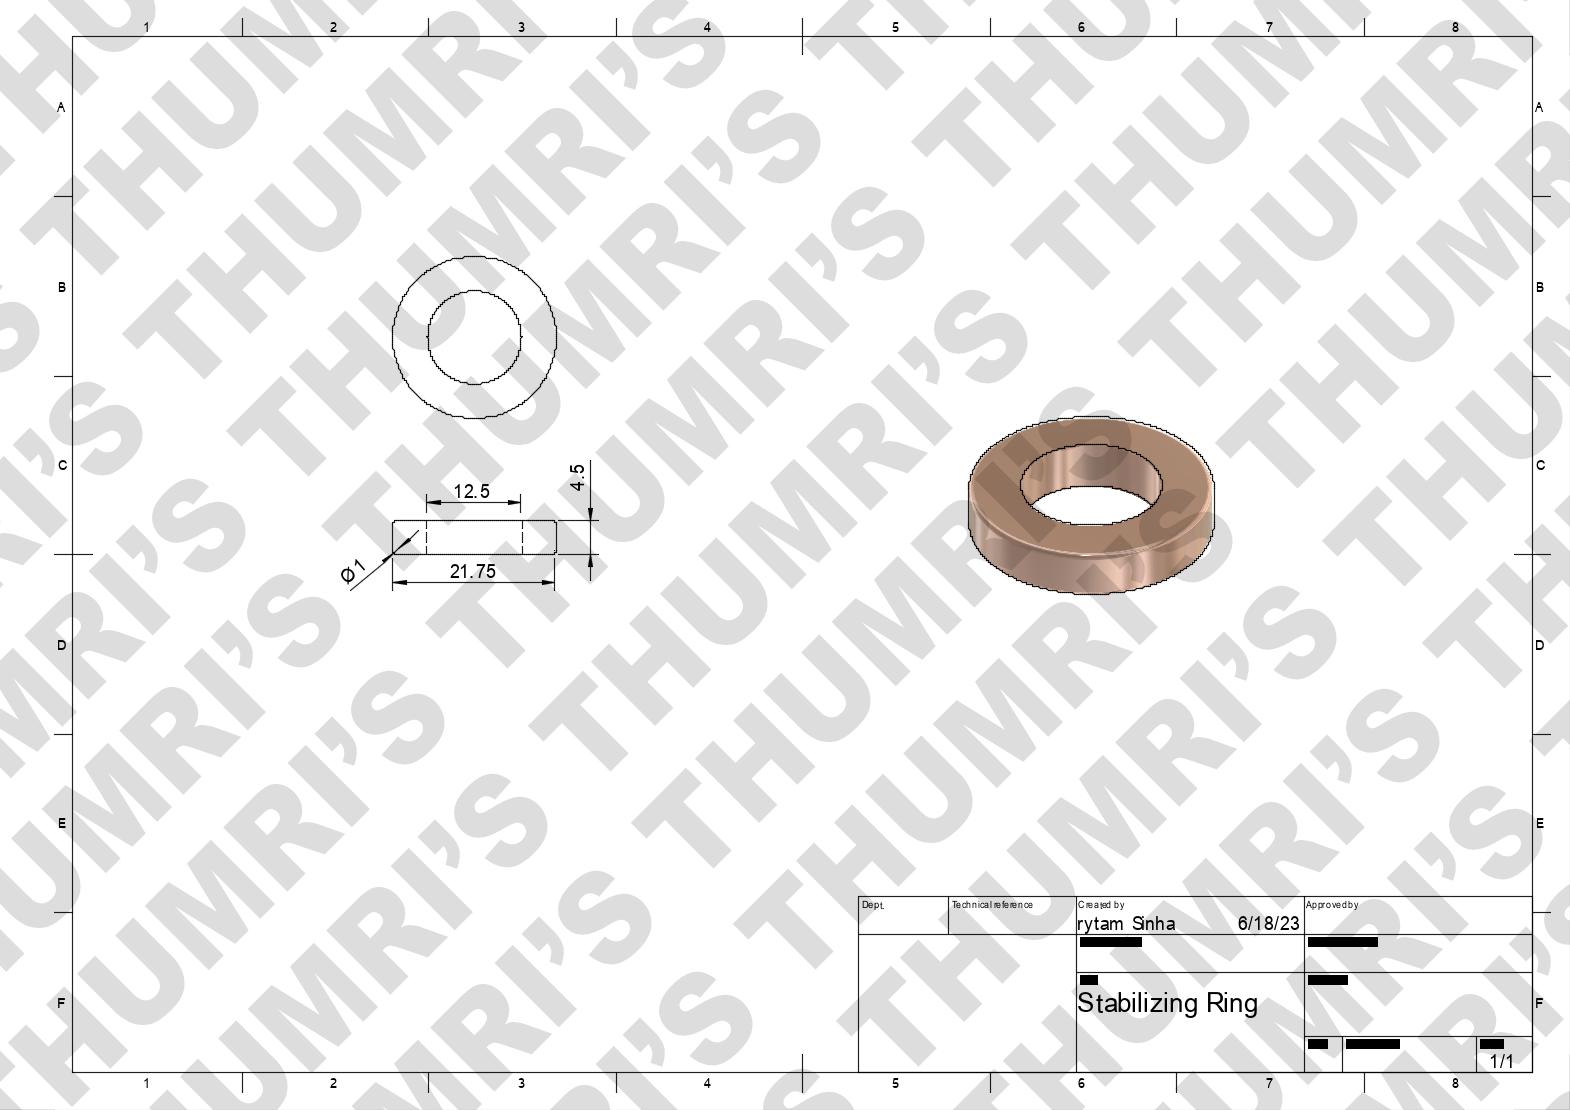
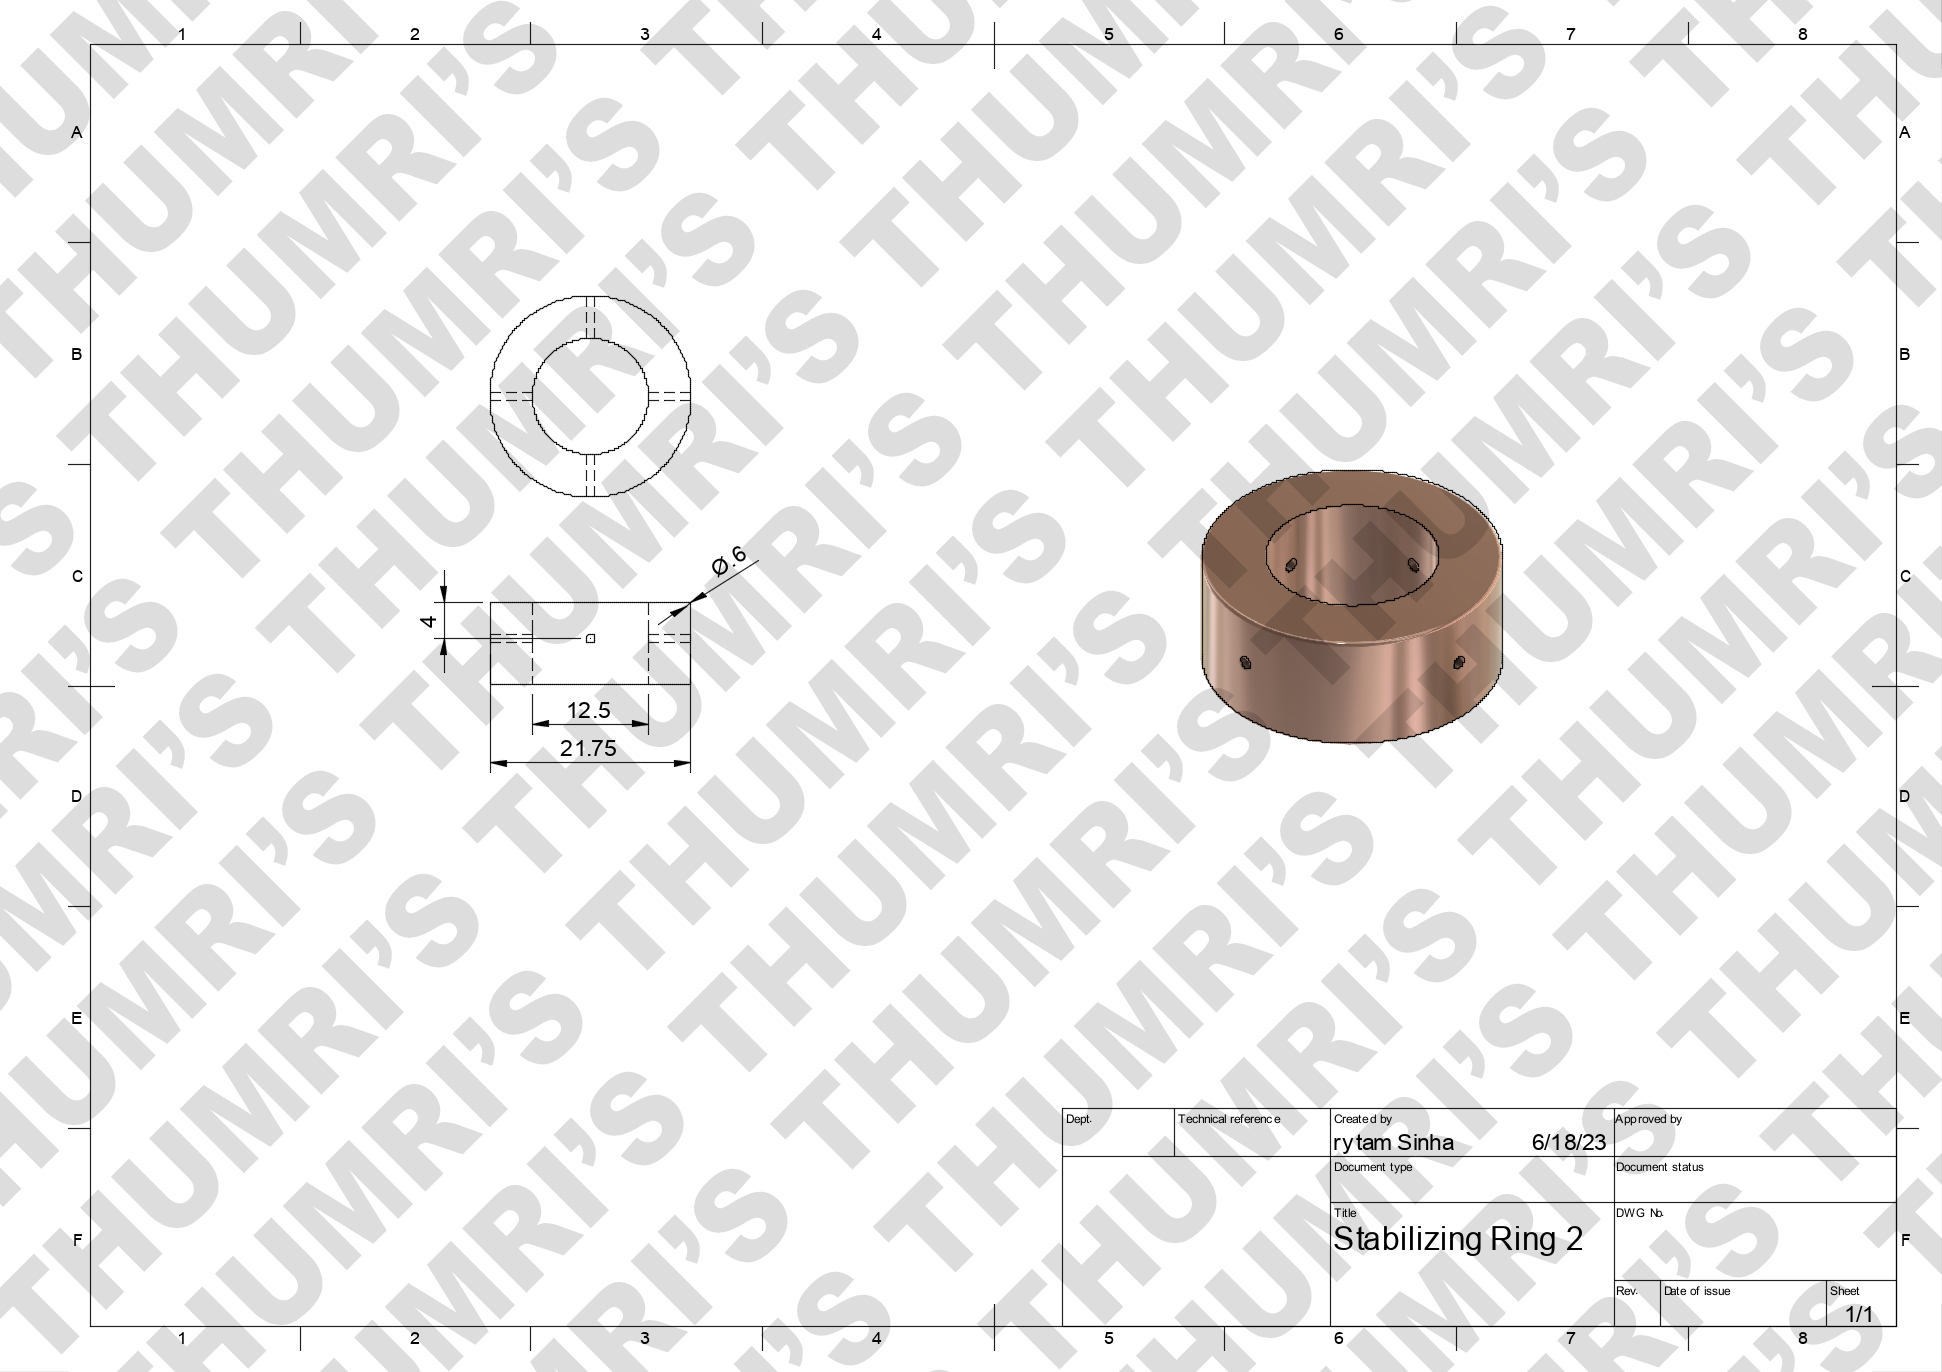
The Core Cage:
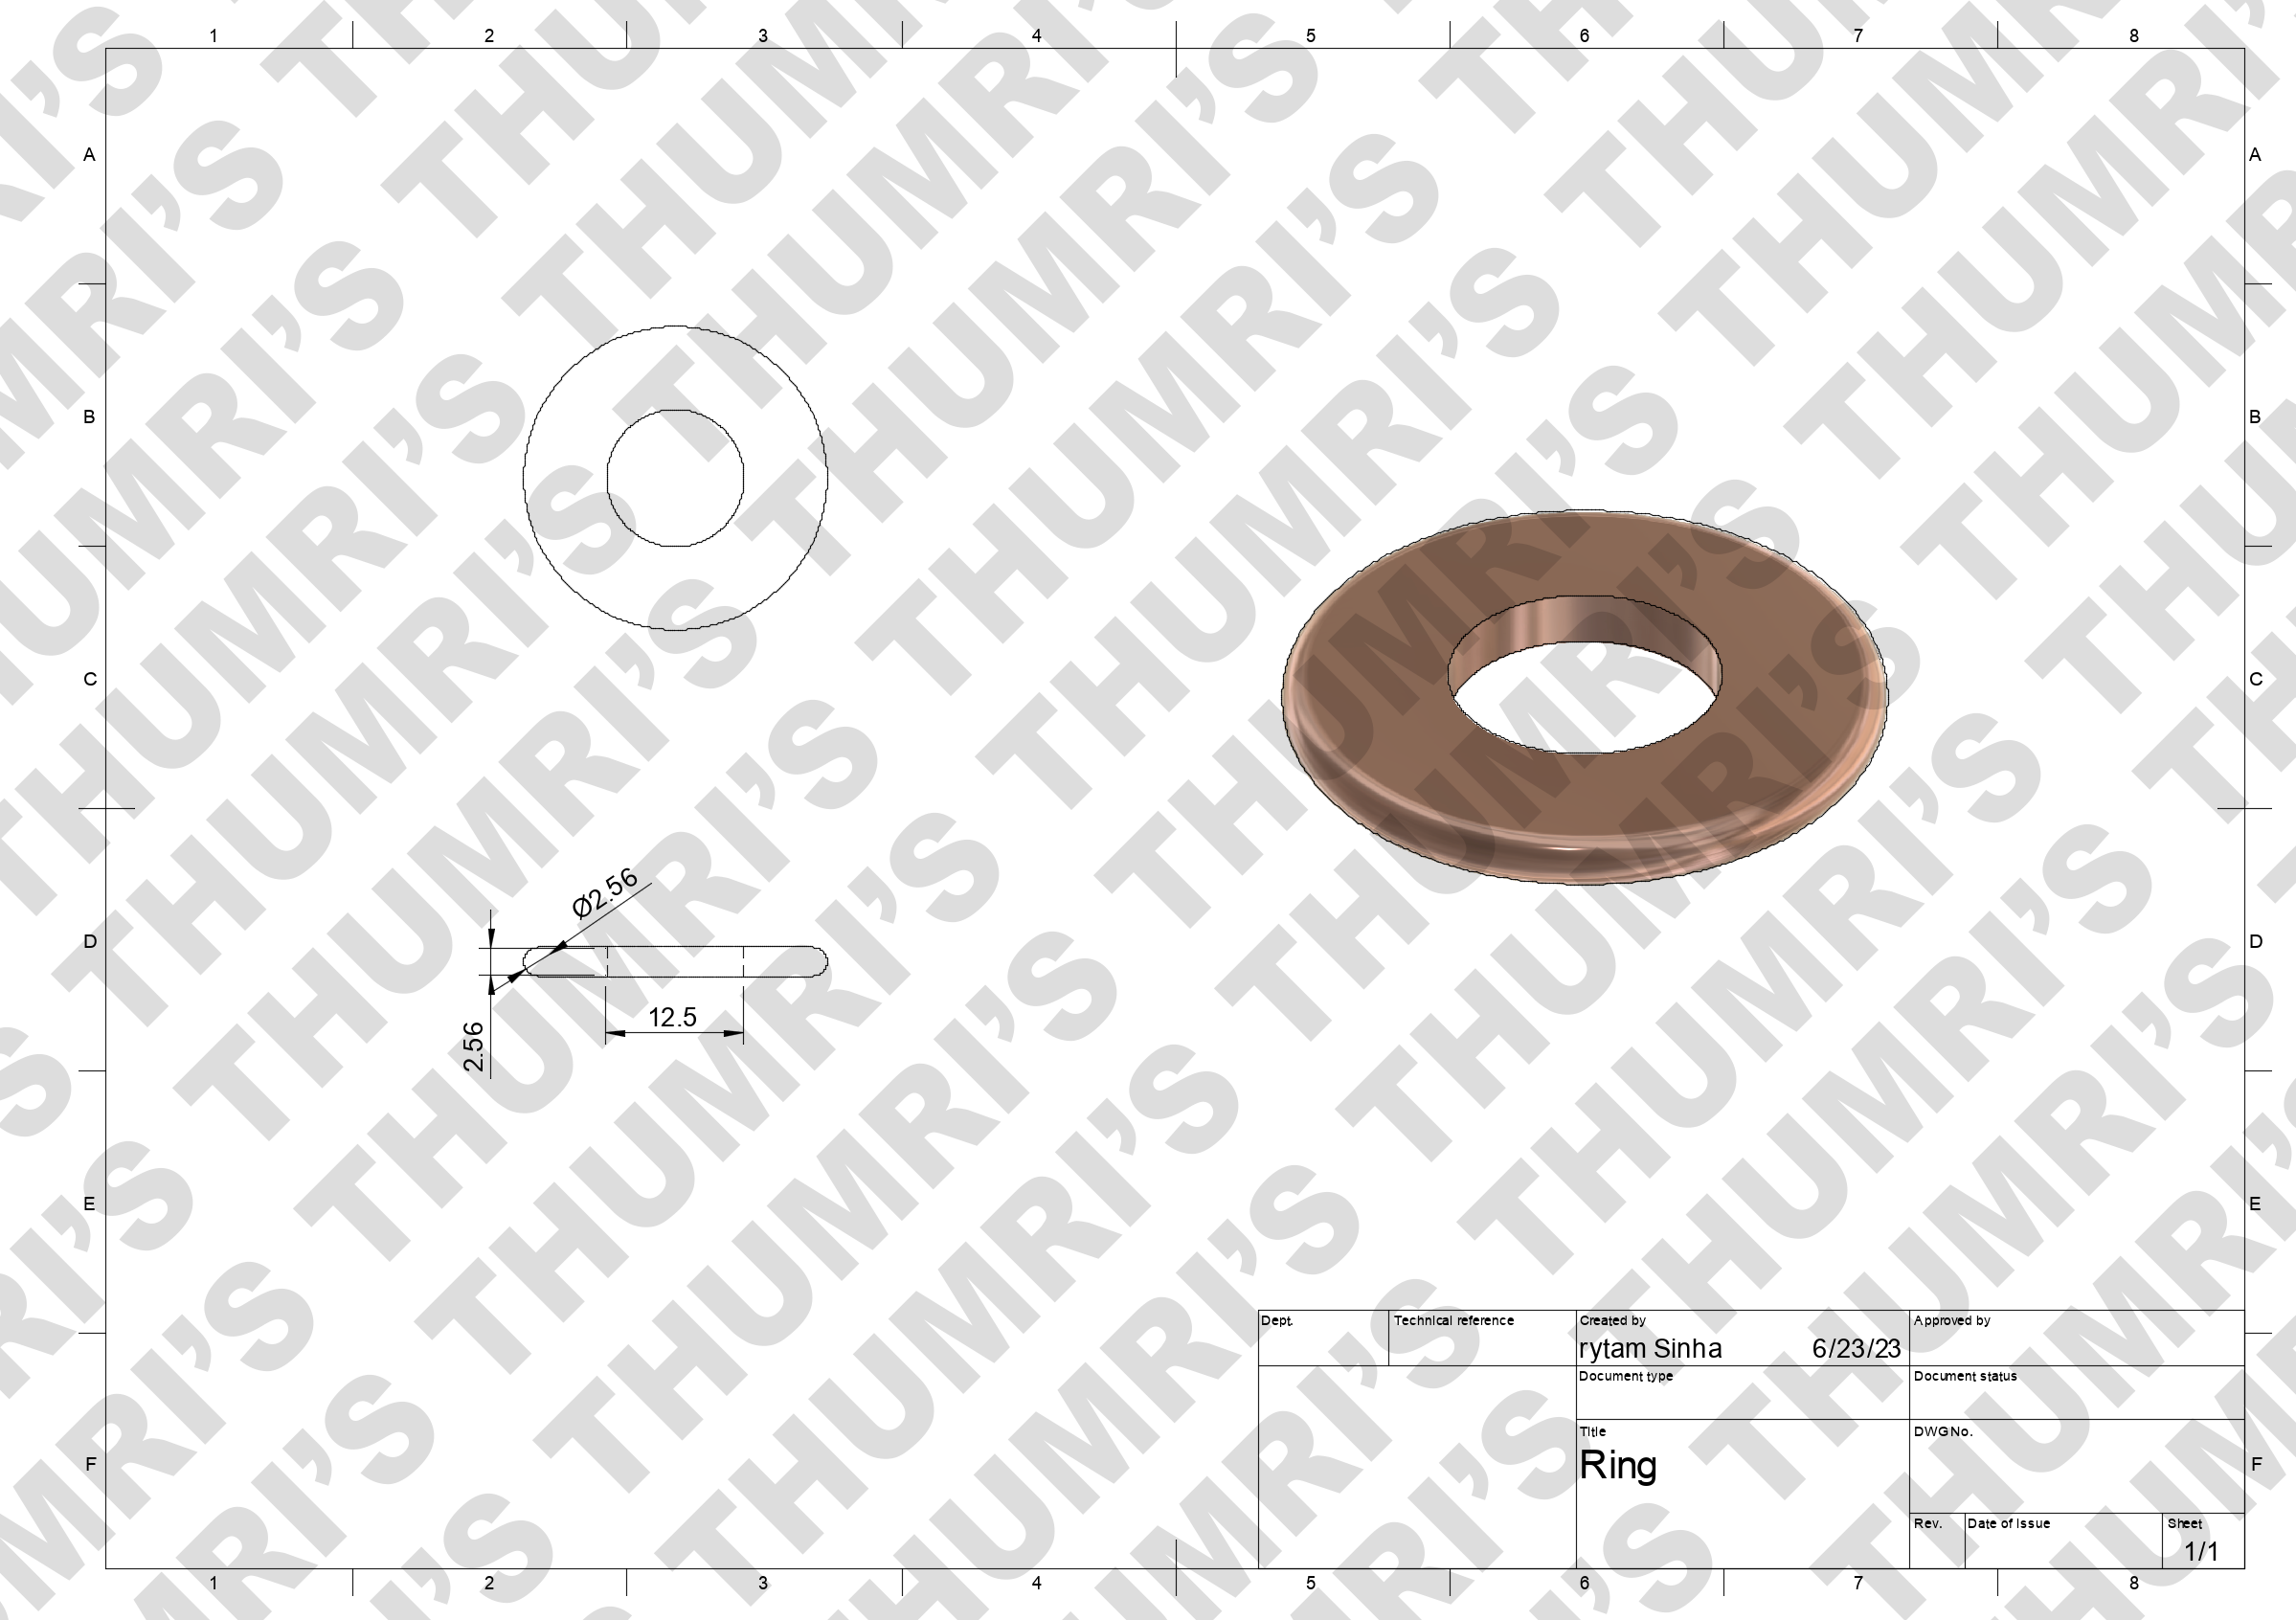
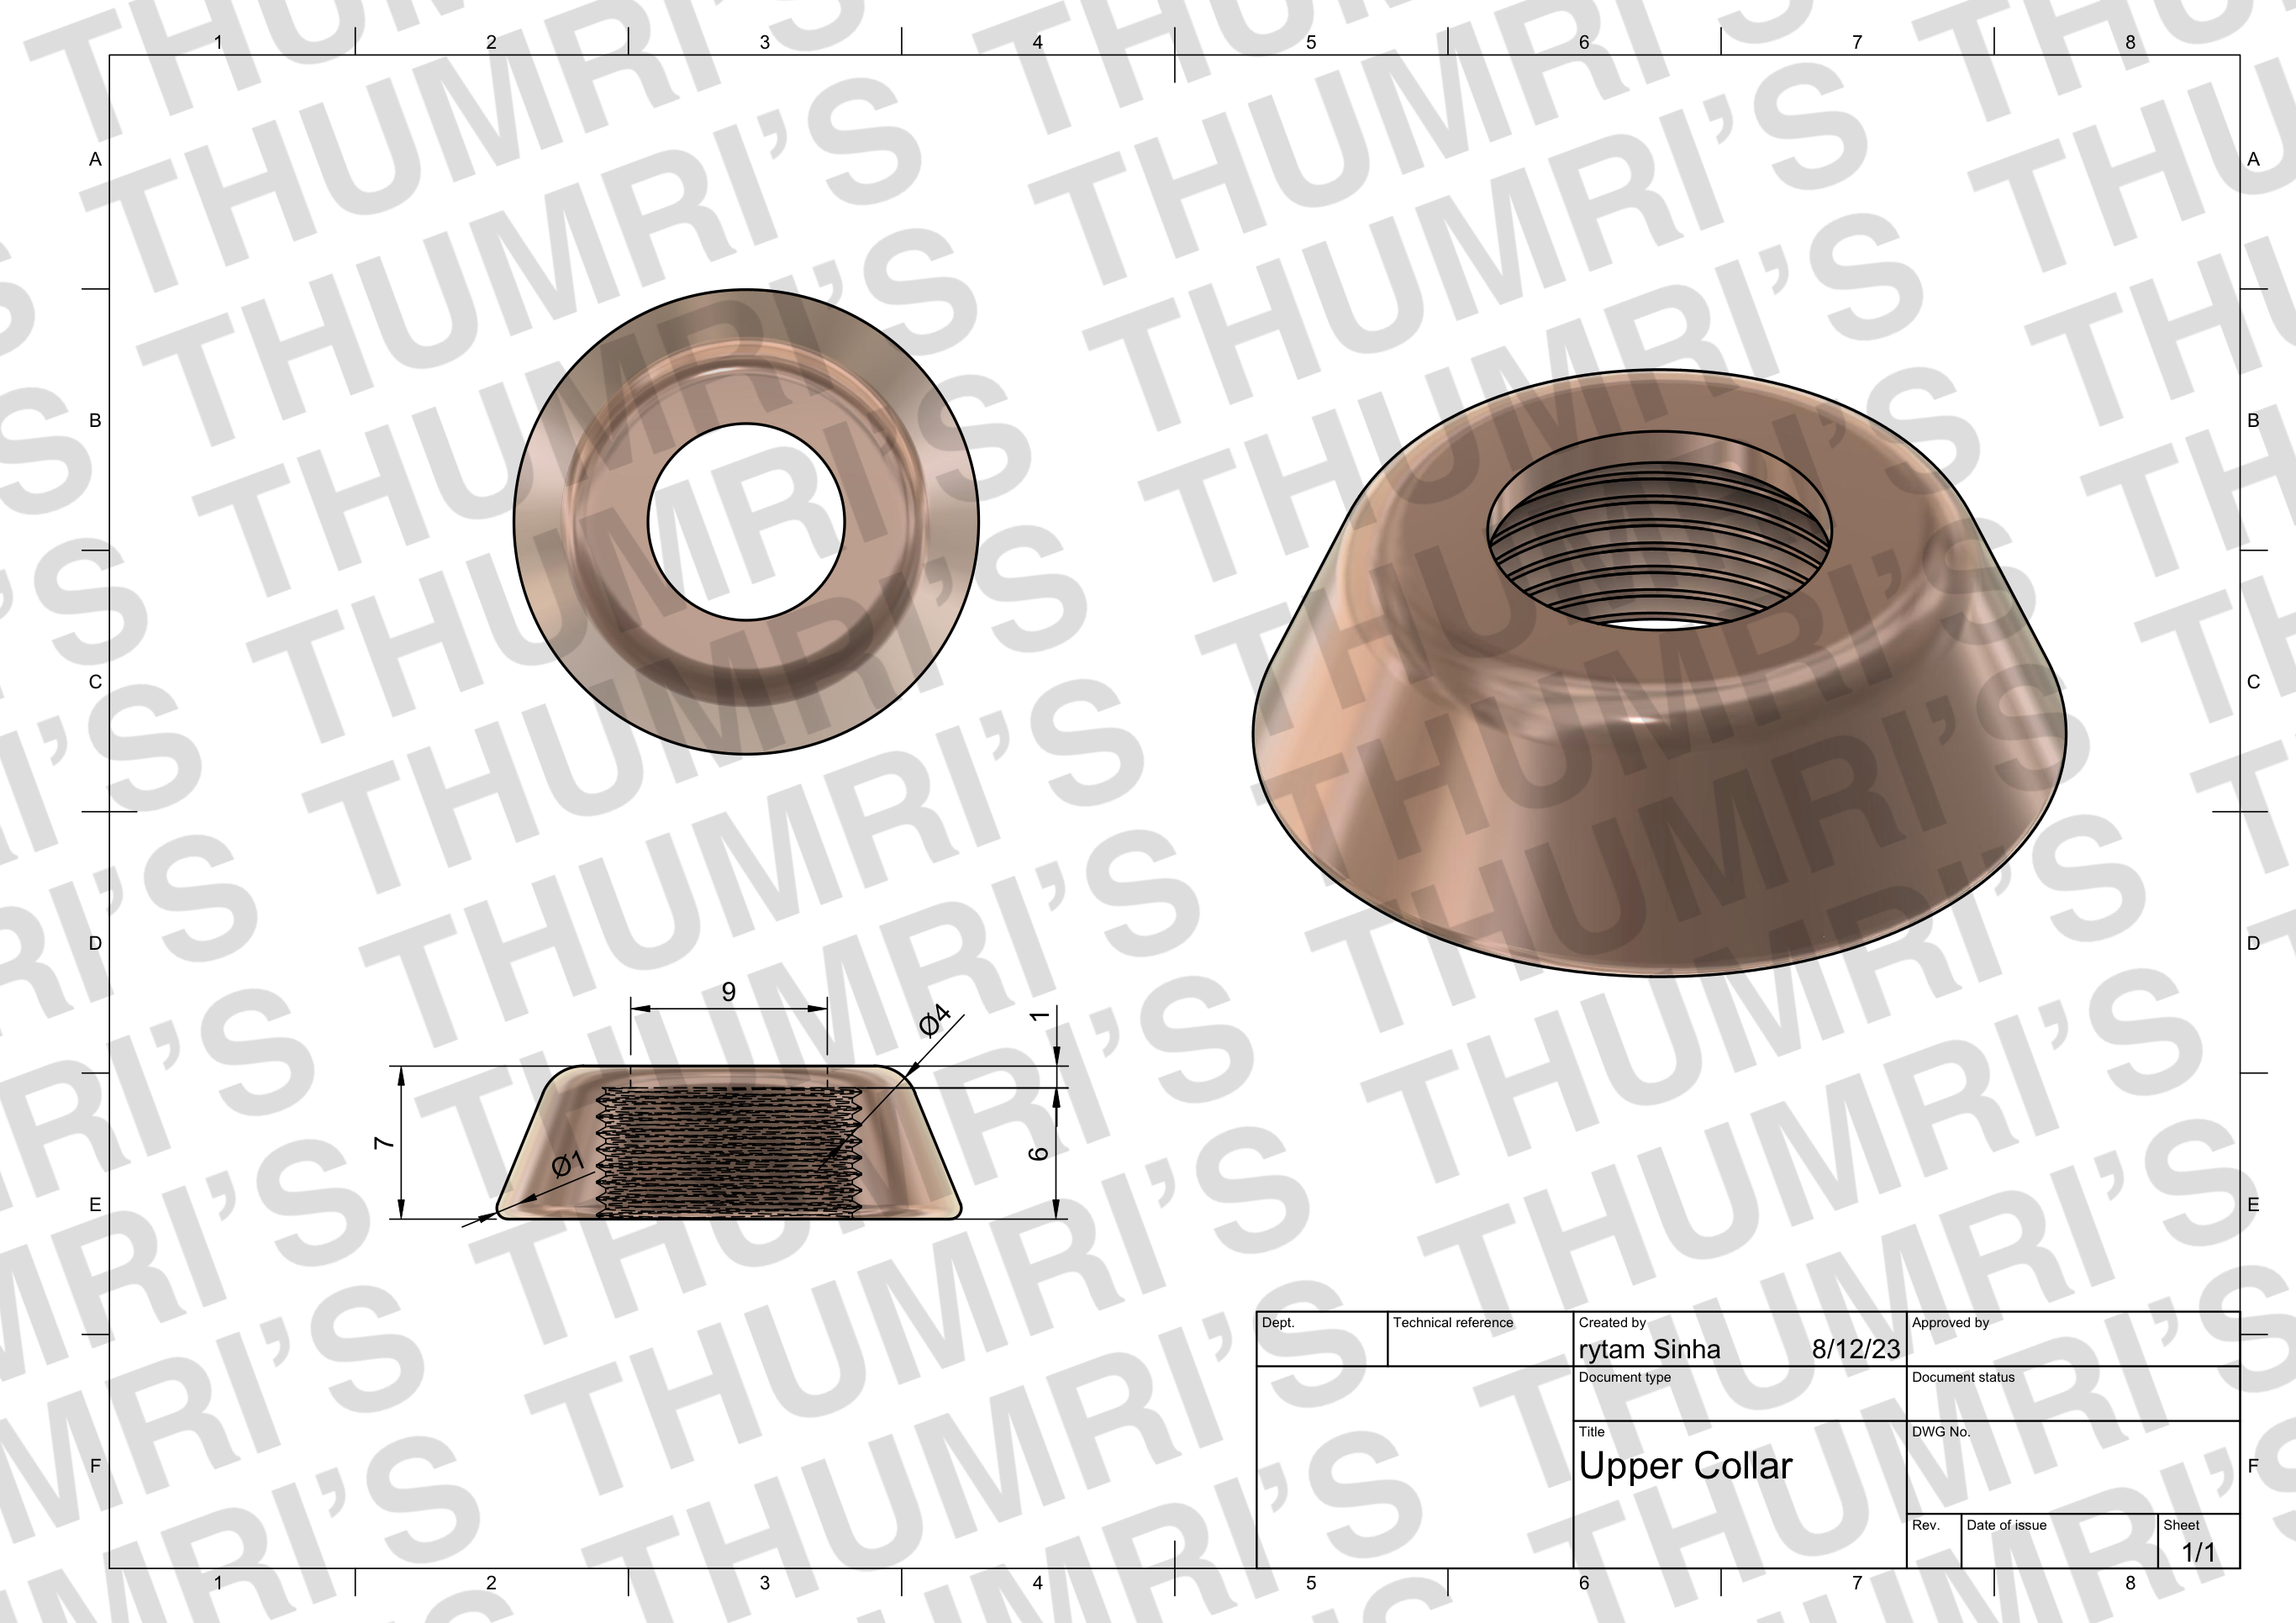
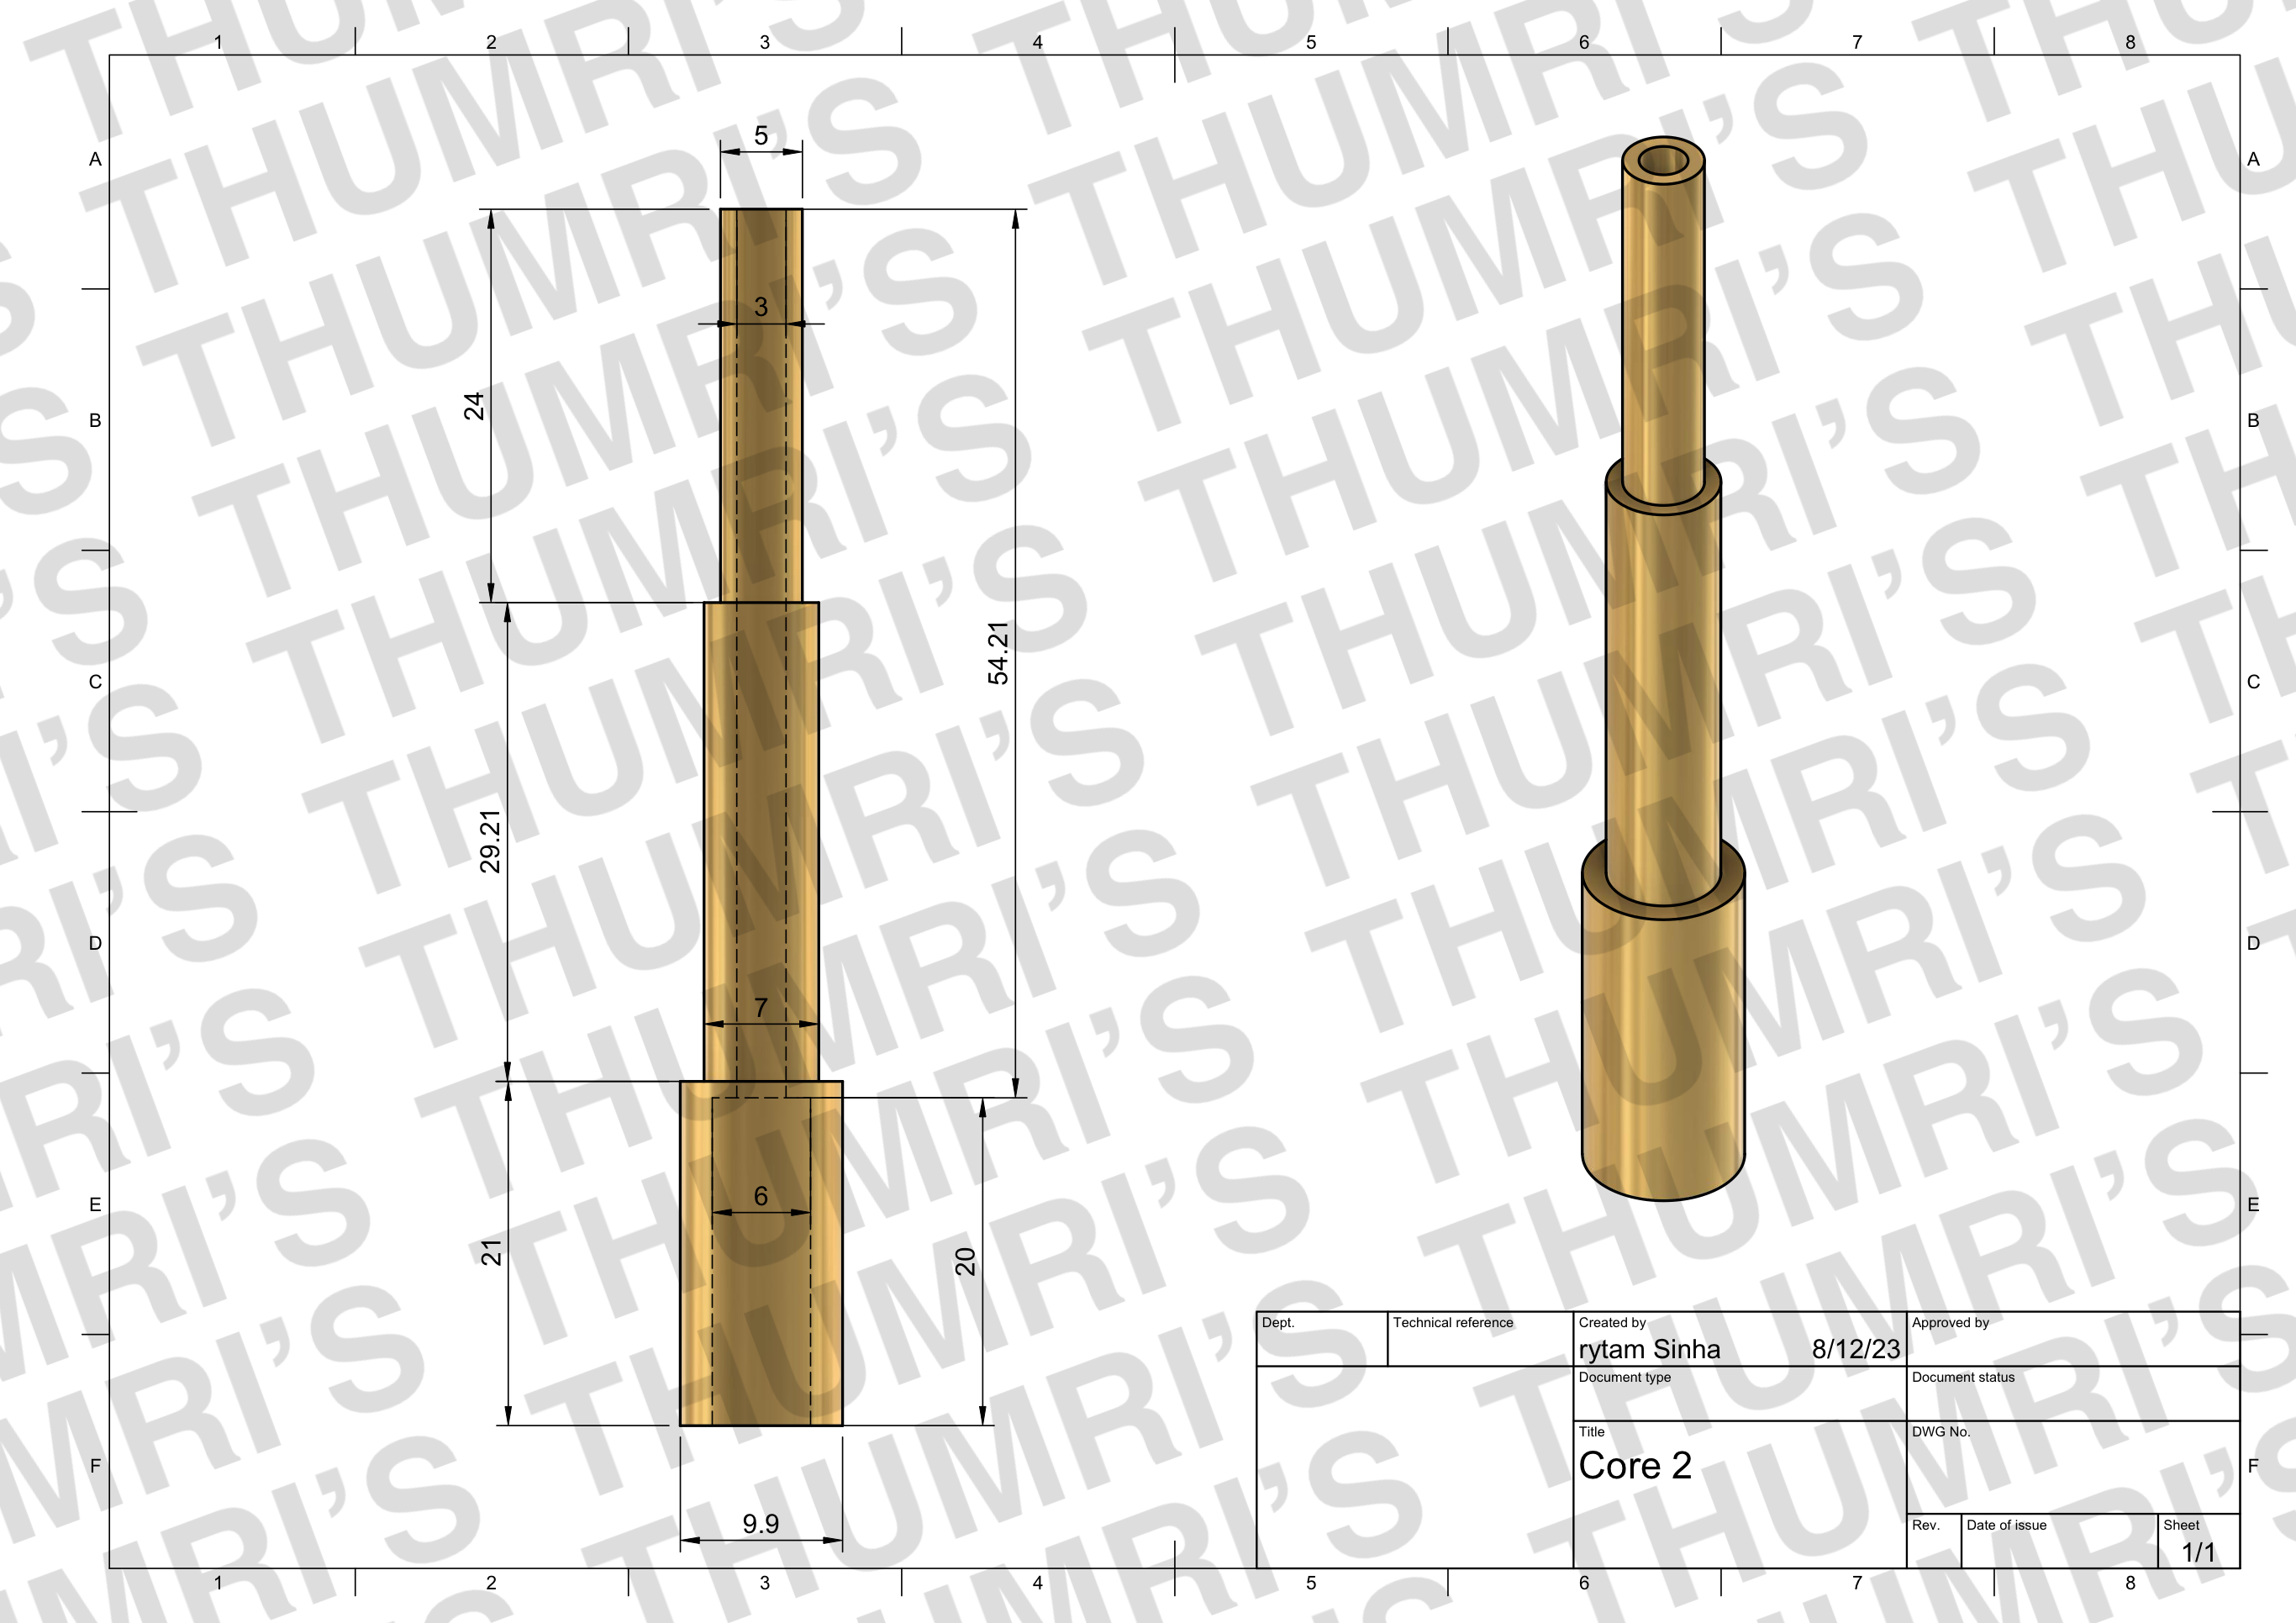
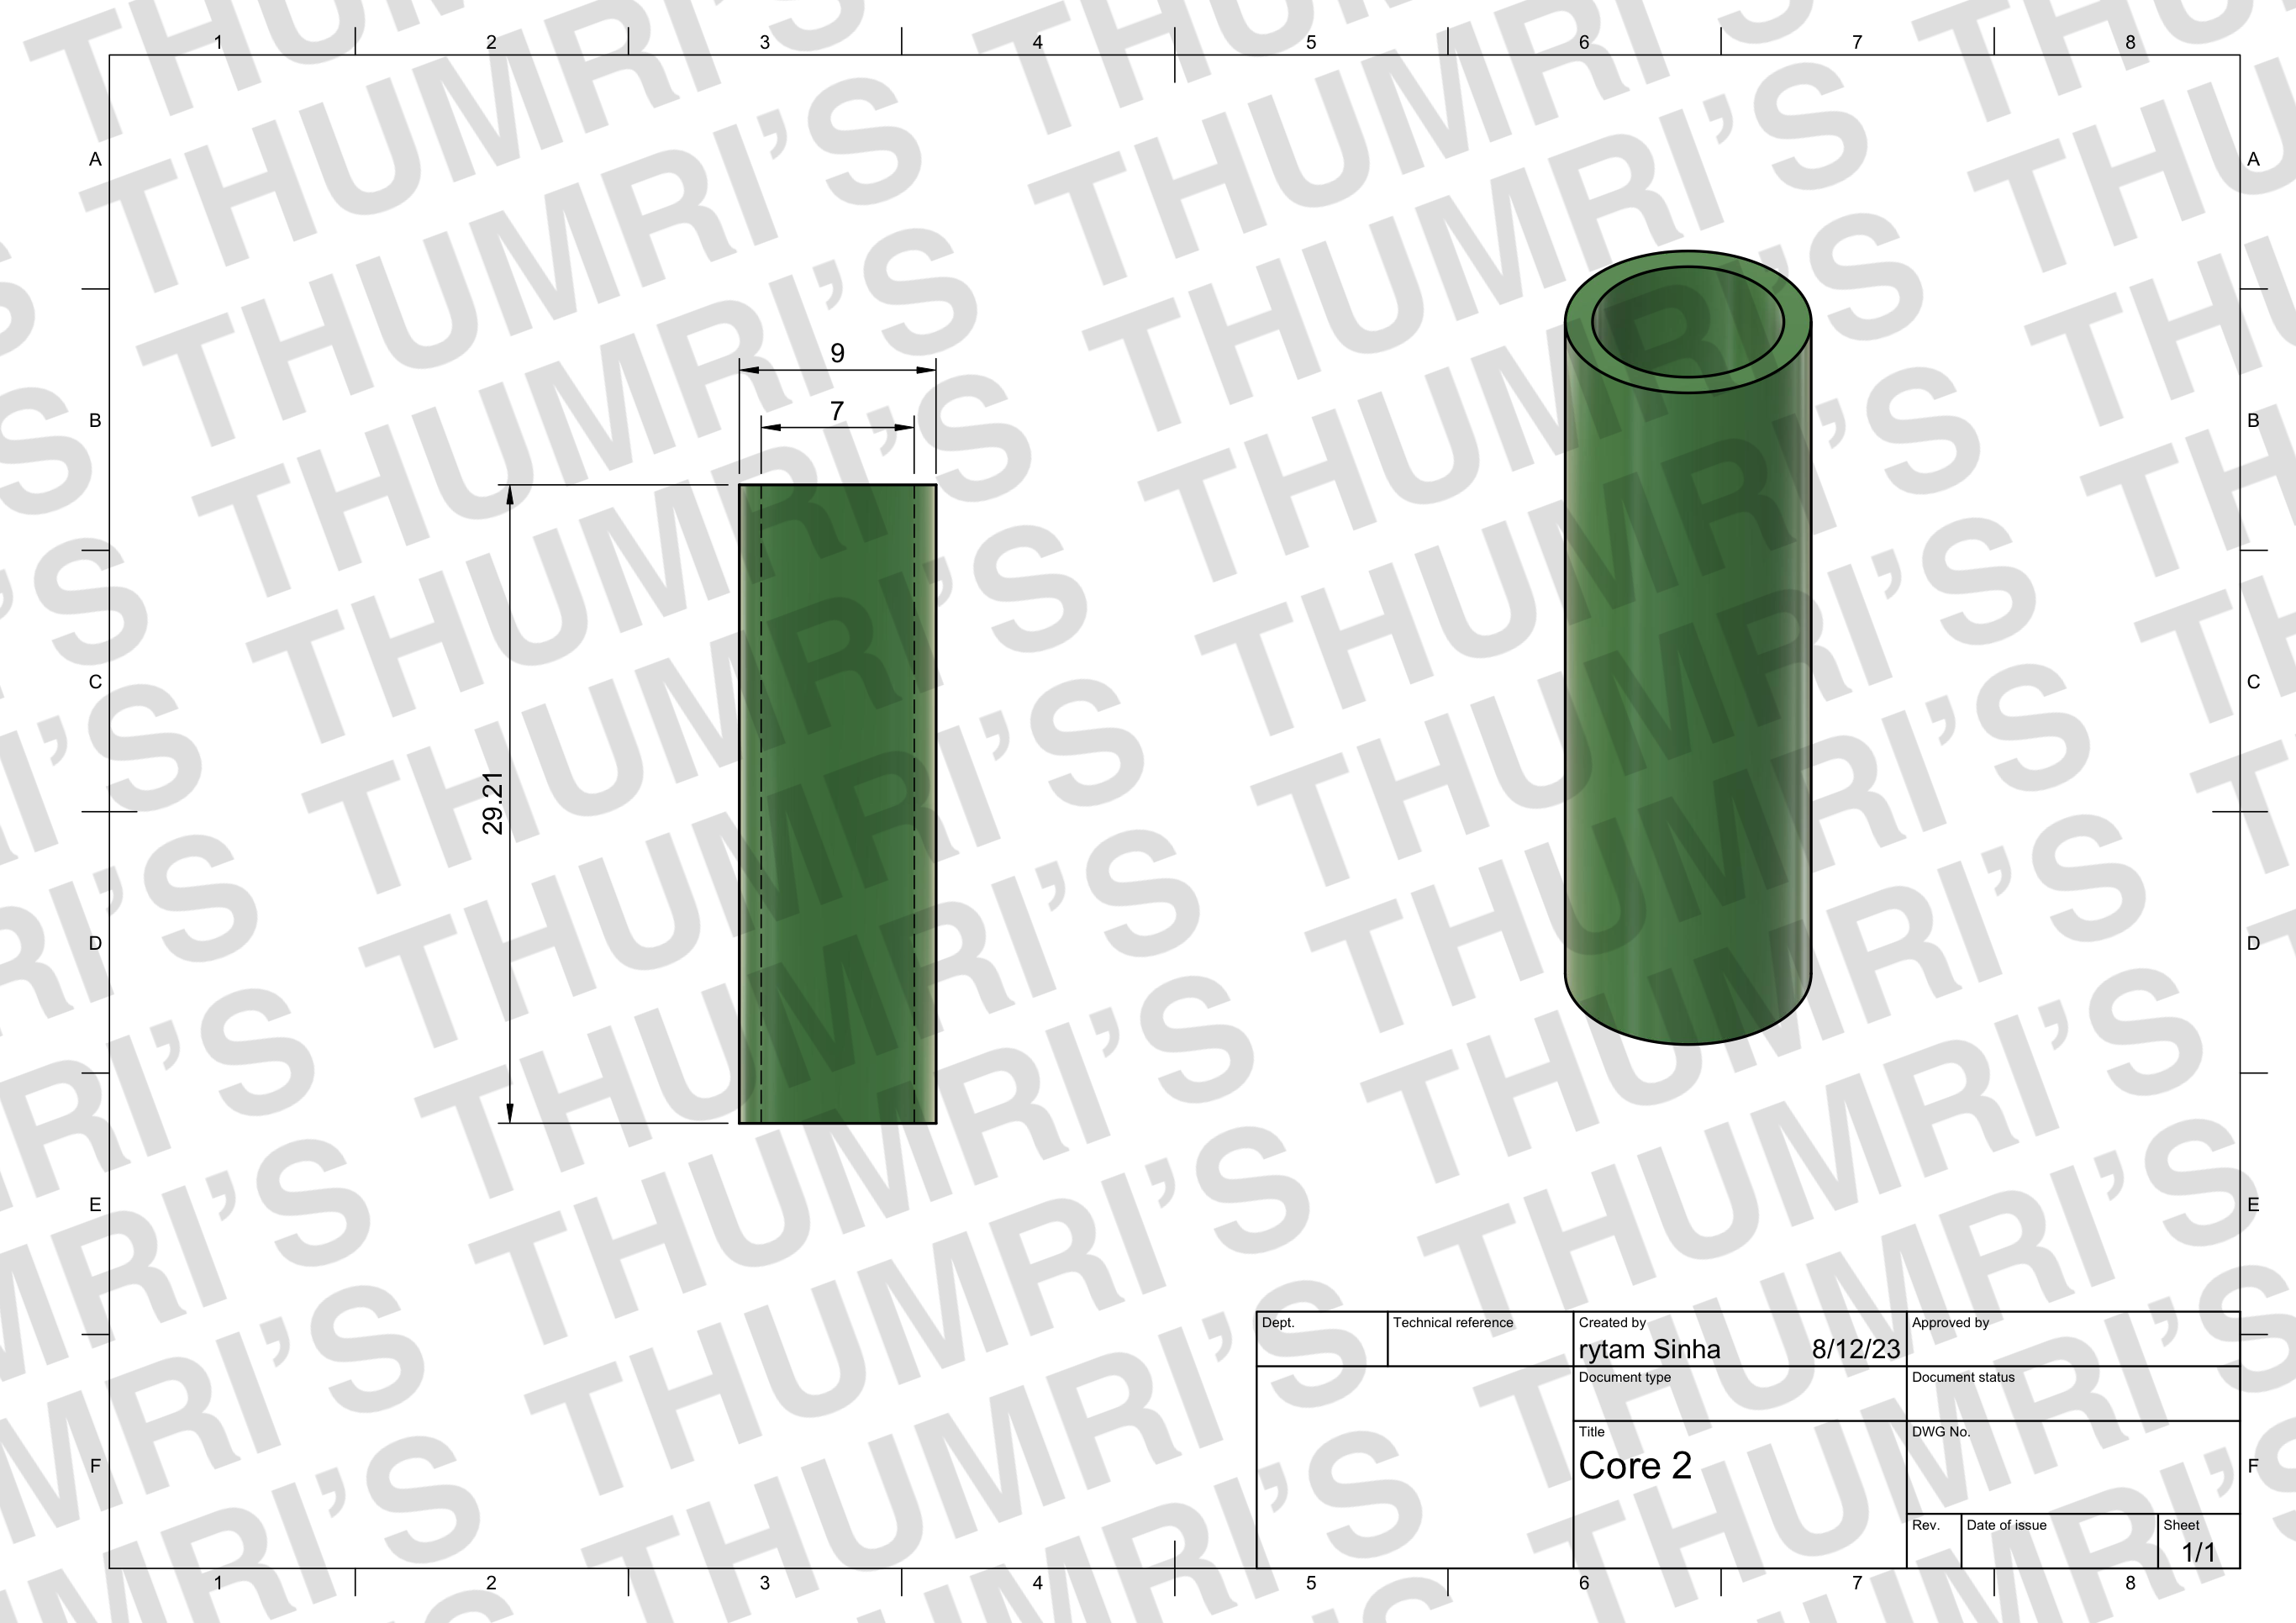
The core cage is the simplest part. Simply stack Collar > Core > Stabilizing Ring > Core > Stabilizing Ring 2 and then connect the 4 copper struts evenly. When finished, the aluminum tube from the handle section will slide through these pieces to keep them from rattling around.
Aluminum Body:
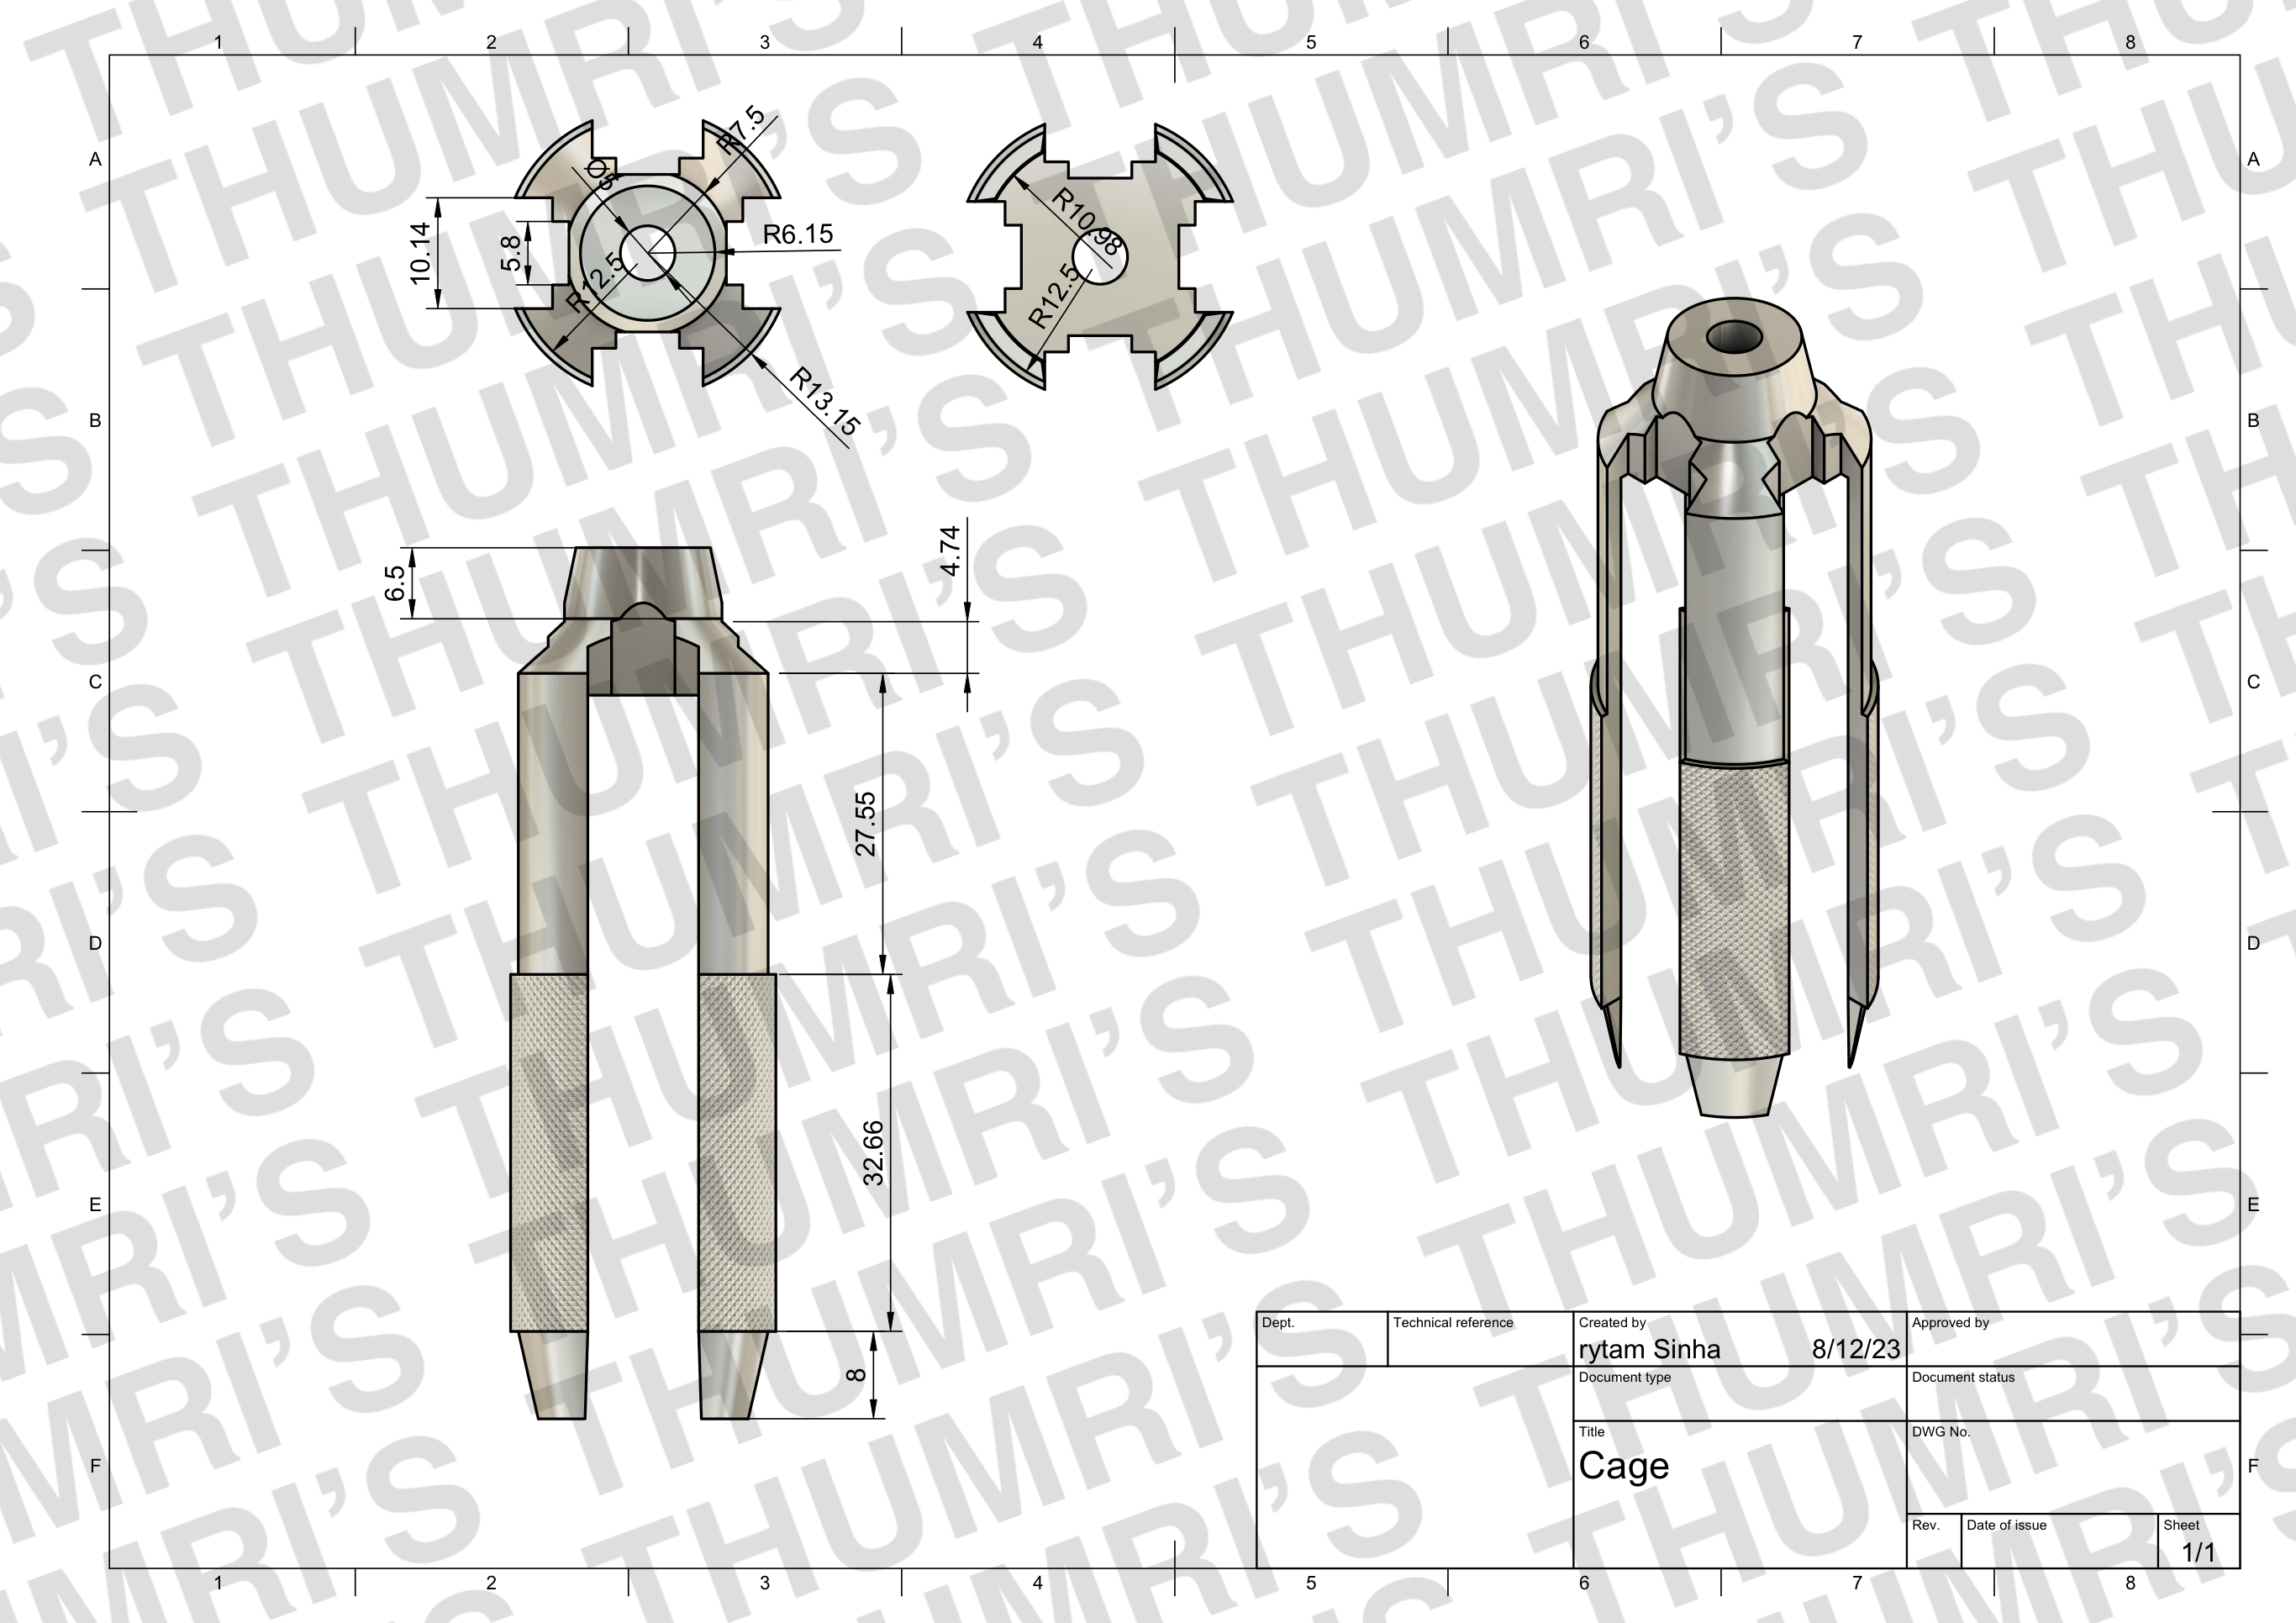
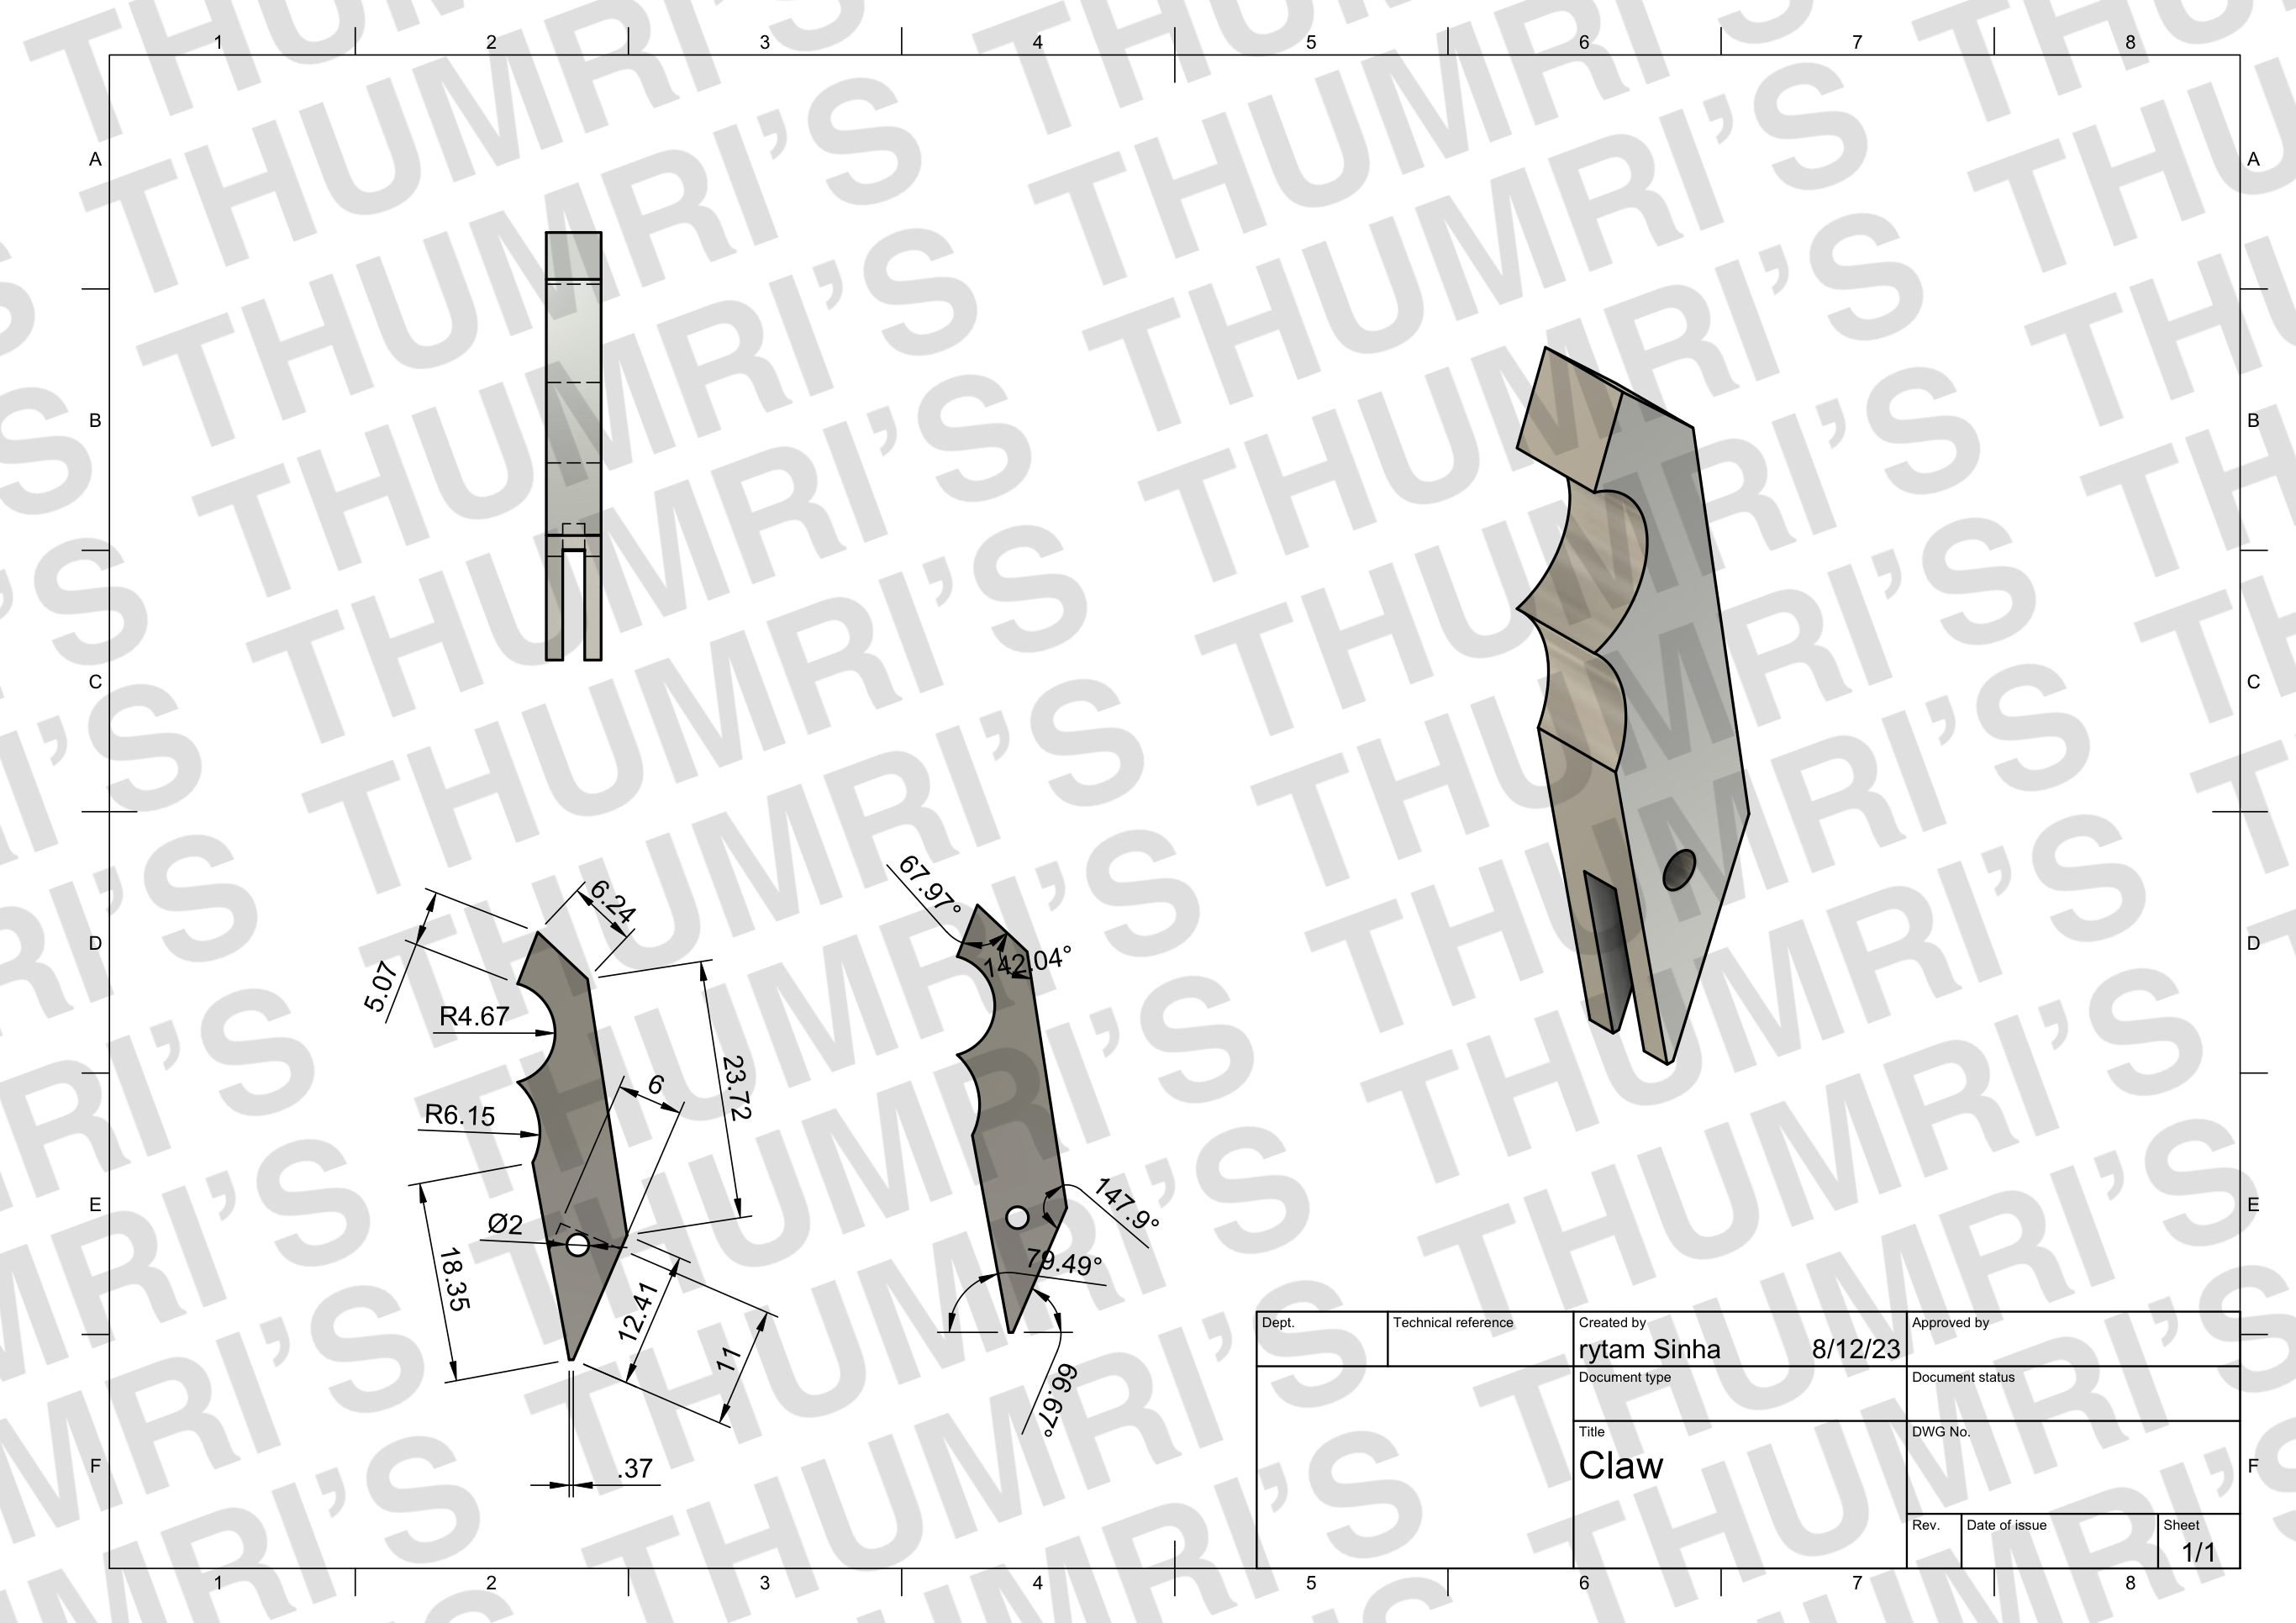
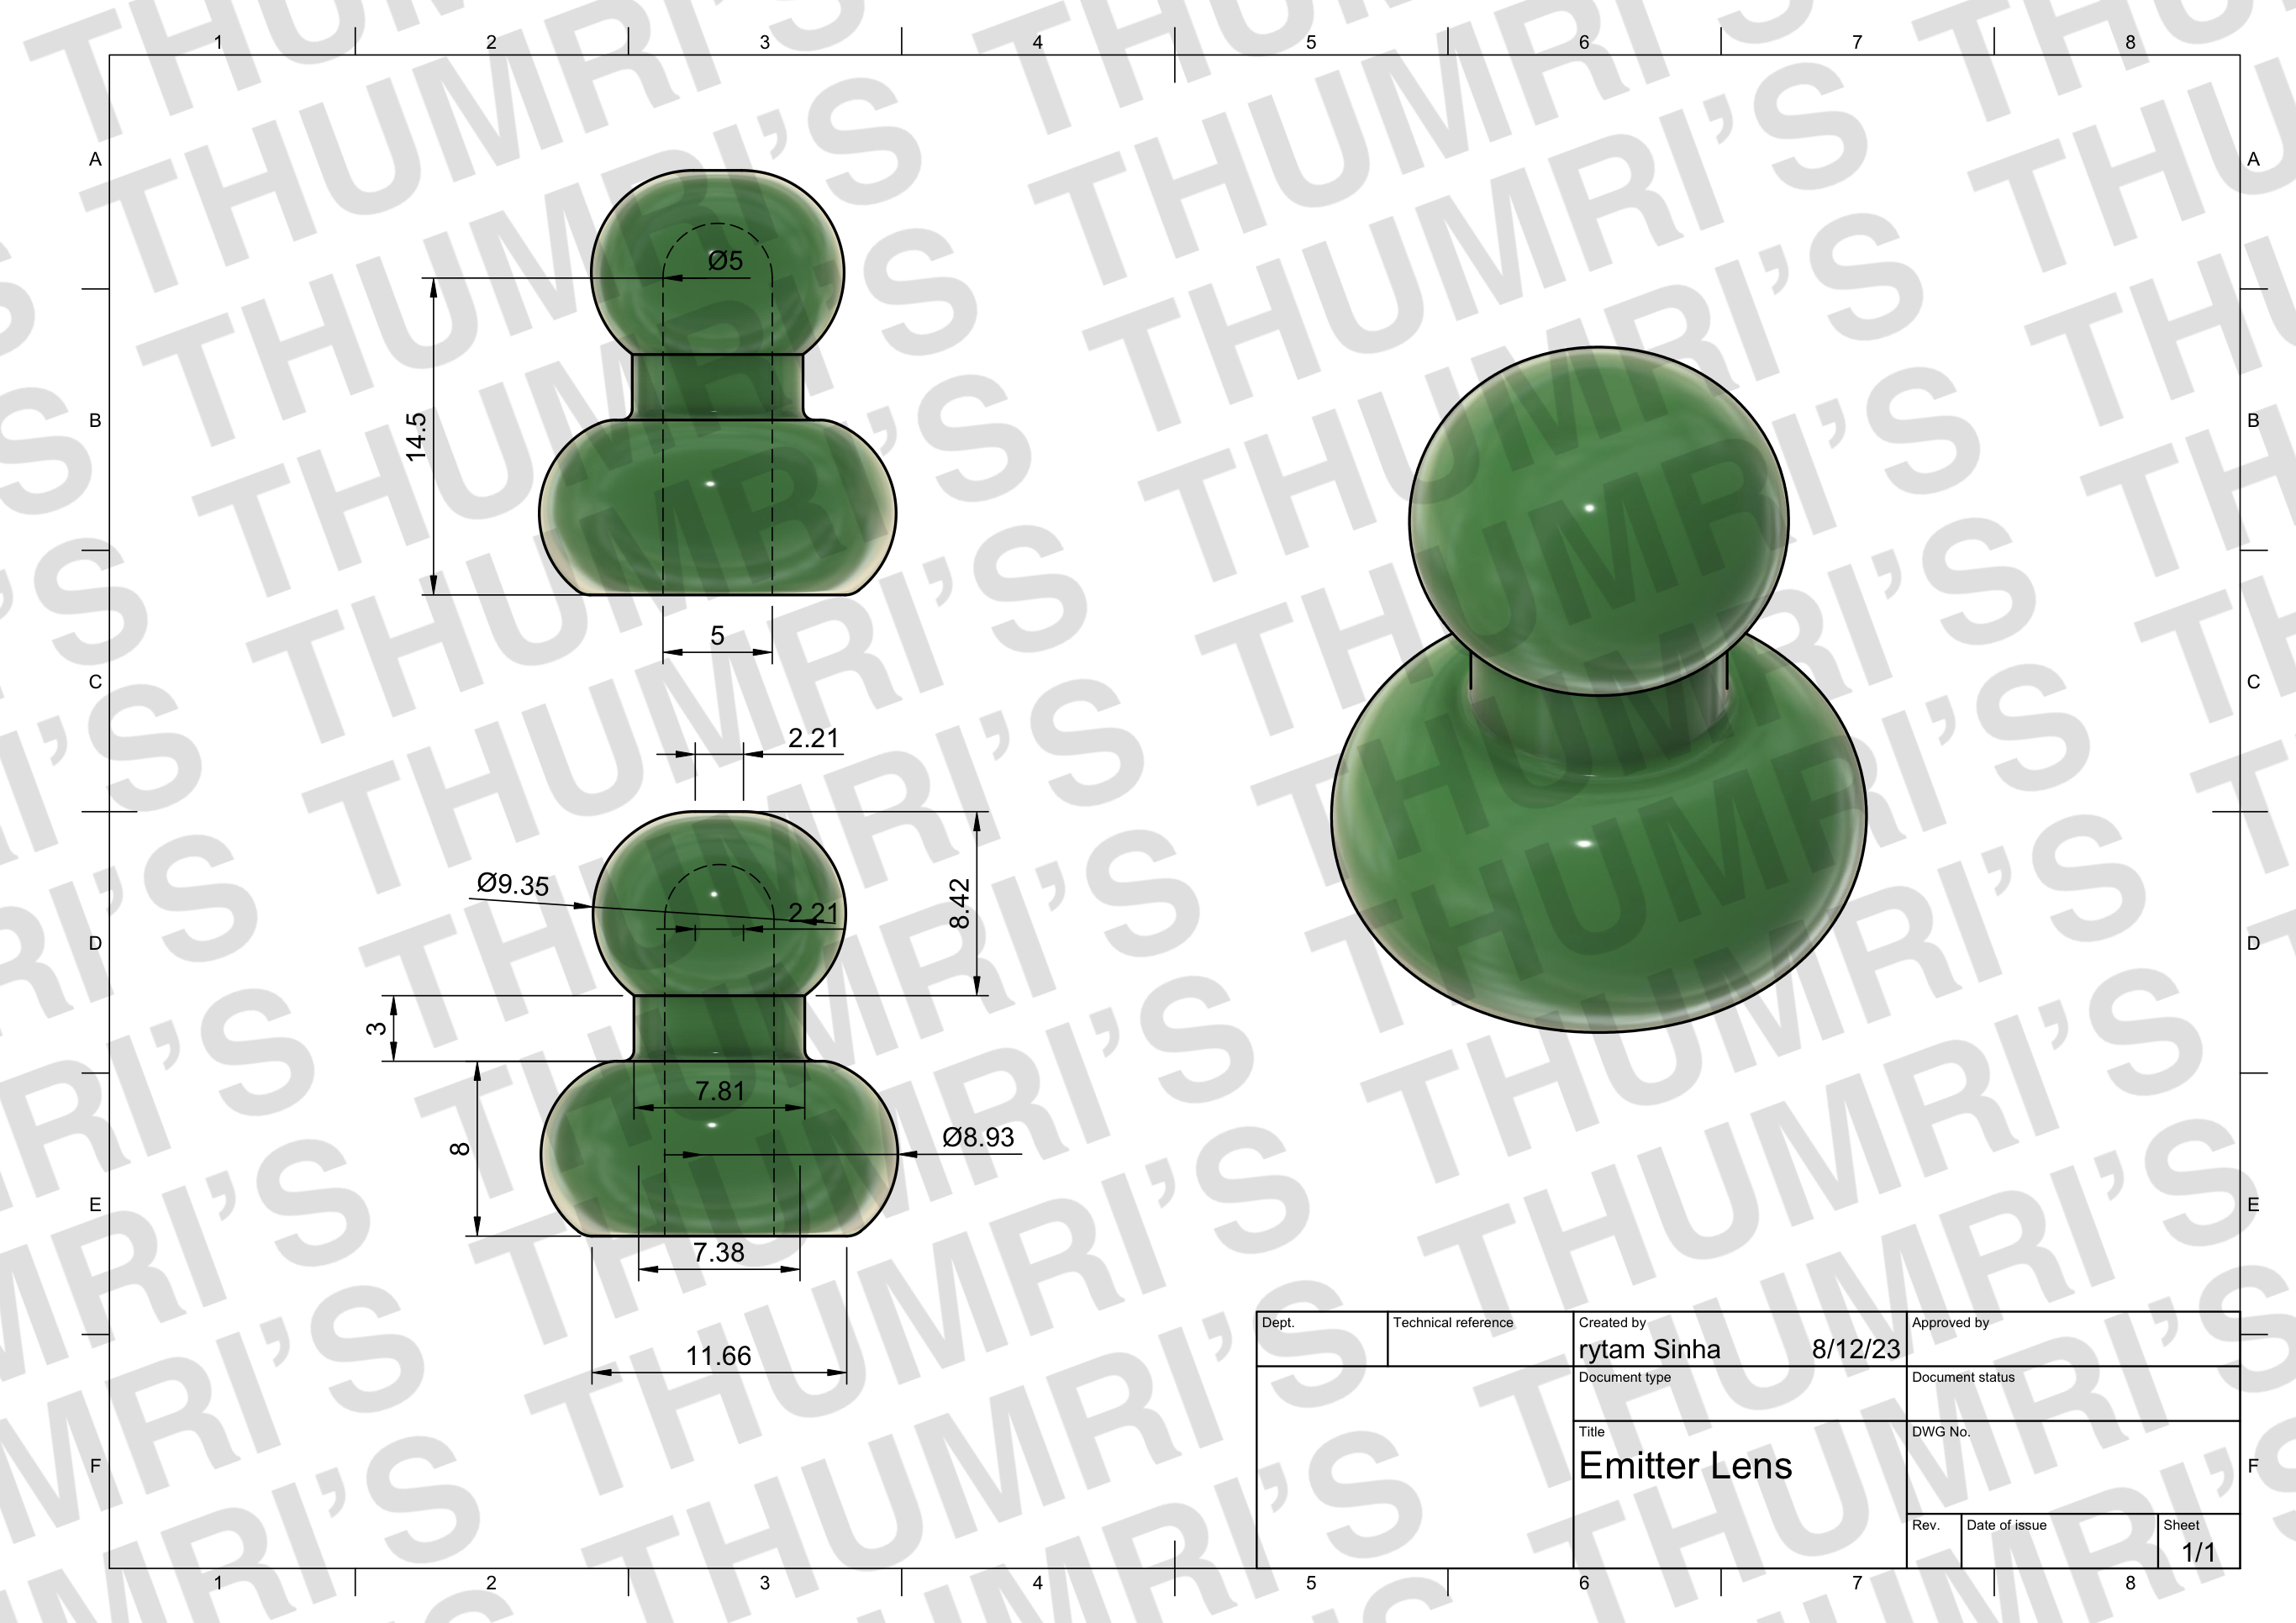
The aluminum body consists of the resin lens, four claws and their holder, aluminum cage, a brass sliding section, a last tubular core, and a copper stopper. First, assemble the claw holder. On your ring, slide your four springs in evenly, and place the ring into the holder. Now, take a claw, align the hole with the hole on the side of the holder and the spring, and then thread the screw through the part. Repeat this for the other three claws. Now take your brass sliding section, slide your core onto it, and then slide the copper stopper. Make sure the copper stopper can’t slide out the other end of brass sliding section. Now, thread the sliding section through the claw holder first and the aluminum body second. Again we suggest adding threads between the brass sliding section and the resin lens, the claw holder, and the aluminum cage. These are more necessary than ones on the endcap as these parts do feel strain when flicked. However, if your set screw goes through your lens and into the brass sliding section, that can hold the pieces together too.
Sliding Section:
The sliding section in the CT is made of brass while on the Rubbertoe it is stainless steel. We recommend making it out of brass or a lighter material to help with the weight balance. On the CT the center of mass is at the top of the leather grip which is quite ideal. On the other hand, the Rubbertoe, the center of mass is almost in the middle of the first collar.
Final Assembly:
Slide the core cage from the top of the aluminum chassis to above the leather handle and thread it together. Then, slide the aluminum cage from the top, making sure the brass sliding section slides well inside the aluminum chassis, and thread the copper stopper to the top the aluminum chassis. If your leeway is good, the sonic screwdriver should flick well.
Files: